
They say the kitchen is the heart of the home, nowadays. I
believe it is the kitchen table that gives the heart a beat. My kitchen table has
raised a family, shared meals, had homework written on, laughed and cried over,
decorated cookies on, love letters composed upon and most importantly, been
there every day of our lives. Silently taking on everything life has to offer.
And life has been good. But there is a price to pay for all good things. A few
scratches, dents and scuffs of everyday life. Not so bad, but it was time to give
back a little love. A new surface, a new look, and renewed love. Here are the
simple steps I took to freshen up my table, you too can follow along and use
these same simple techniques to give a fresh look for your heart beat too.

This is what you will need-
Sander
Medium and Fine Grit Sandpaper
Paint Brush/s, Sponge Roller
Primer
Semi-Gloss Cabinet Paint
Metallic Paint
Clear Satin Polycrylic Finish
Script Stencil…to purchase…link here.
Stencil Spray Adhesive
Stencil Stamp/Sponge Roller
Paper Towels
Painter’s Tape
Scissors
Pencil
Scissors
Pencil
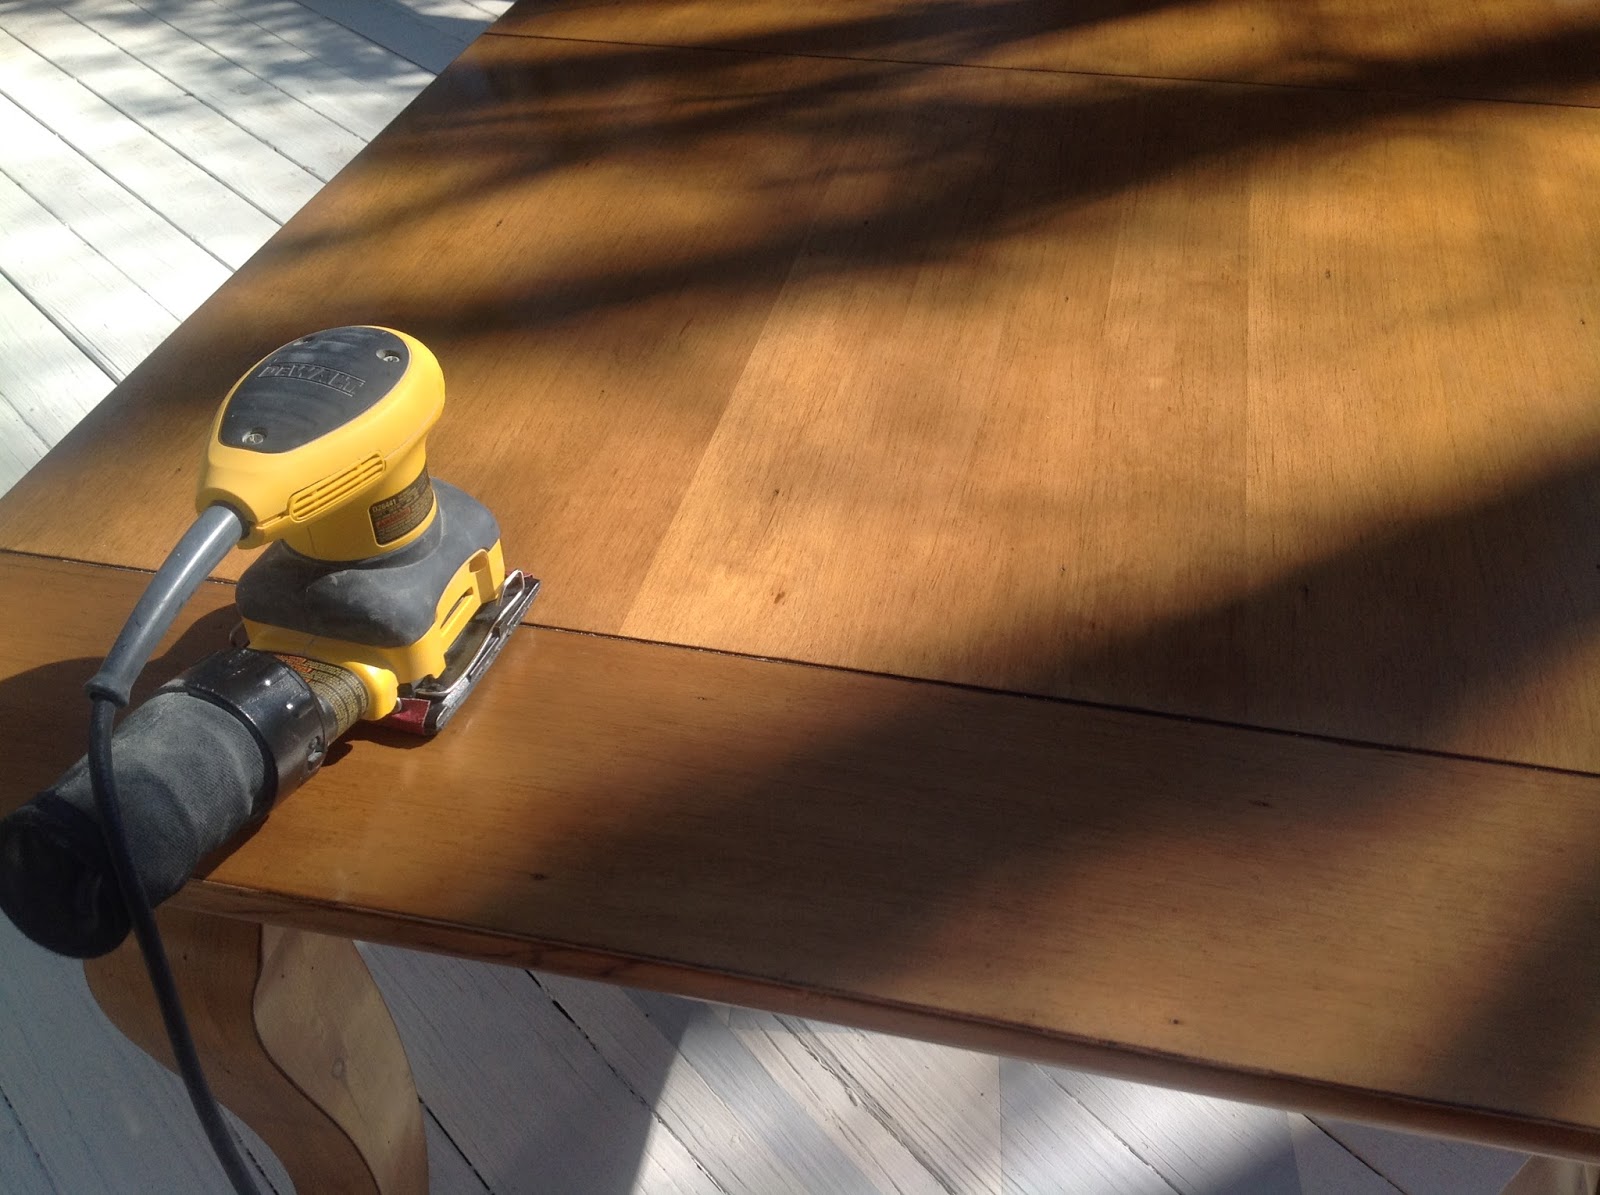


Start by sanding the surface of the table with the medium
sandpaper. This step can be done by hand or with an orbital sander. So much
quicker with power tools. Just sand enough to rough up the surface so the paint
will grip when applied.


Wipe down table to remove the sand dust.


With a brush or sponge roller, paint one light coat with
latex primer. Let dry overnight.


The next day, give the top a light, gentle, by hand, sand with the medium sandpaper. Paint one light coat of cabinet paint. Use either a brush or sponge roller to apply the paint. Let dry overnight.
Sand lightly by hand with fine sandpaper.
Paint a second and third coat with the cabinet paint. Let dry completely. Lightly sand between coats. Let dry overnight between coats.


I covered the top of my table with craft paper to layout the
design of the stencil. This stencil is titled "Springtime in Paris". It is light and delicate. Just perfect.

This stencil comes in two large sheets, so I cut the stencil
into strips for easy handling. The cut line was used to line up the stencil
along the table edge as a guide to keep the lettering straight.


I took a pencil to lightly fill the words in so I could get
a feel for how it would look. I numbered each stencil strip so as to make sure
I kept them in order.

For two corners, I outlined a running rabbit garden element
onto paper. Cut out the silhouette, then traced it onto an empty space of the
stencil material. Then I cut out the shape and created a stencil for the ends.
Once I was happy with the look of the script on the craft
paper, I was ready to stencil.
Outside, or in a well ventilated area, lightly spray the
back side of the stencil with stencil adhesive spray. Let dry about 10-15 minutes.
Place stencil onto table. Gently smooth the stencil down
with your fingertips.
Shake or stir your paint.

Pour a small amount of paint into a small container.

With your sponge or roller, tap a small amount of paint onto
the sponge. Tap excess paint off the sponge onto the paper towel. Keep as
little as possible paint on your sponge.


Start with a light layer of paint by tapping onto the
opening of the letters. I have found it best to start with a light layer of
paint then go back over lightly a second or third time.

Remove stencil. Move onto the next stencil strip and repeat the
tapping process. Once all the letters and shapes have been stenciled, let dry
overnight.


Create a thin boarder (about 1/8”) on the edge of the table
with painter’s tape. Run one strip on the table top edge, then one strip below.
Lightly press when applying the tape, then go back and press firmly to prevent
any paint from seeping under. I didn’t measure, just eyed it. I use my
thumbnails to press the tape edge down, running non-stop, all the way around the
table.


With a smaller paintbrush (about 1”) fill in the space
created by the tape with your paint. By the time I painted all four sides, it
was fairly dry, so I painted a light second coat of paint.


To finish the top, you need to protect the newly painted
surface. I like this finish because it is durable for eating and drinking on
without use of coasters or place mats and never yellows over time. I used four coats of Minwax Polycrylic protective finish in clear satin, applied by sponge
roller. I waited one day between coats, even though the directions state you
can apply a second coat two hours after the first coat. Do not shake the can of
finish, just stir before using. I did sand between coats three and four, very lightly in spots, but not over the stenciling or the border on the edge.The finish will dry smoothly and show few if any roller lines. Happy with how the
protective top coat finished. Let it dry overnight and my table is ready once again for life.

Lay a runner on….

Set the table...


0 comments:
Post a Comment