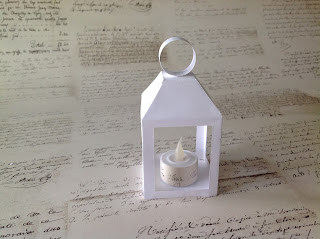
“One, if by land, and two, if by sea”…so make three and keep
everyone guessing. These cute little paper lanterns aren’t intended just for
hanging in your windows. They look great lined up on a table top, placed in
front of a mirror or perched on an end table. Endless possibilities! Adorable
just about anywhere you set them. Easy to make, and easy to love.
Follow these simple steps, and you too can bring a little light and love into your life.
Follow these simple steps, and you too can bring a little light and love into your life.
This is what you will need-
Paper Lantern Pattern
White Paper Stock
Pencil
X-Acto Knife
Scissors
Straight Edge
Cutting Board
Clear Tape
Clear Drying Acid-Free Glue
Battery-Operated Tea Lights
Download the Mini Paper Lantern here. Solid lines are cutting lines, dotted lines
are scoring lines.
Print pattern. Make one copy, reusable for each lantern.
Trim excess paper around pattern.
Tape pattern onto white paper stock. Tape all outside edges
to the paper stock.
Carefully cut lantern out on the outside solid line (cutting
line). Lift pattern off card stock.
Cut out one window from the paper pattern.
With a light pencil line, trace four lantern windows onto
the paper stock using the window opening that you just removed from the pattern
as a guide.
Using a straight edge, remove all four of the windows. I
first scored the pencil line lightly and then with a second pass of the X-Acto
to cut though the paper.
Lightly score all dotted lines, using care not to cut
through the card stock. You may enlarge photo to see the score lines.
Gently fold all the scored edges.
Starting from the bottom up, apply glue on the three tabs of
the base of the lantern and on the only side tab on the window section of the
lantern.
Let the glue “sit” for a minute or two.
Gently attach the one window side tab to form a "box". You may have to hold
the tab in place with your fingers for a moment or two. Let sit for a minute.
Lift the base up into the lantern to form the base. Hold the
three tabs in place until secure.
Apply glue to the tabs on the roof. Let glue sit.
Attach the tabs of the roof sections, holding one at a time.
Move on to the next section once the glue is secured. Repeat for all four roof
sections. Let dry.
Apply glue to the tabs on the top. Let sit.
Carefully slide the top through the opening of the roof. Attach the tabs to the roof. Hold
in place until set. Let dry.
Cut a strip of paper stock ½” wide by 3 ½”.
Roll the strip around a pencil.
Uncurl the strip, form gently into a ring and glue together.
When all is dry attach the paper ring to the top with glue.
Repeat all steps for each additional lantern.
Add your battery operated tea lights.
For fun I glued a strip of script paper to decorate
the tea light.
Sweet little lanterns. They may be small in size but they
are big on ambiance. So make a few, and place them in the window and see who
comes to visit. Enjoy your cozy home.


0 comments:
Post a Comment