
Don’t you just love looking at pictures and pictures of
tables set and ready for entertaining? What is it about a nicely arranged table
that gets a nod, a second glance? Or a “I wish I could do that” on my table. One
of the main components of a well-set table are the linens. Beautifully folded
napkins and coordinated runners or tablecloths. I prefer a runner. Just enough
color or texture to tie all the dining components together. A statement that
defines a theme to your table. The anchor of the table. The personality. And
they are so easy to throw on, care for and collect. A few good runners and you
can completely change a look to a table all the while using the same dishes and
utensils. I love them because they are so easy to make and take up hardly any space to store. Once you know how, you can change the look on a whim. If you can dream it, you can make it.


This is what you will need-
Fabric (roughly 3 yards of 54” wide fabric)
Sewing Machine (or your local dry cleaner/alterations)
Thread
Straight Edge
Pencil
Scissors
Pins
Needle/Fusible Tape (optional)
Iron
Small Screwdriver or Point Turner (optional)
Even if you do not have a sewing machine, you can cut your fabric and follow these directions and take your fabric to a dry cleaners that offer alterations. Repeat. If you can't sew, your local dry cleaner, friend, fabric store may offer lessons, or referrals of someone that would like to sew it for you. Just like your new best friends at Home Depot that cut your wood for other projects. The point here is don't let your lack of sewing ability keep you from designing custom runners that you and your guest will admire and enjoy.
Even if you do not have a sewing machine, you can cut your fabric and follow these directions and take your fabric to a dry cleaners that offer alterations. Repeat. If you can't sew, your local dry cleaner, friend, fabric store may offer lessons, or referrals of someone that would like to sew it for you. Just like your new best friends at Home Depot that cut your wood for other projects. The point here is don't let your lack of sewing ability keep you from designing custom runners that you and your guest will admire and enjoy.

Prep your fabric according to the manufactures directions.You may want to stay away from a dry clean only fabric. It is after all going on the table. I like machine wash and
tumble dry fabrics for their easy maintenance. Suitable fabric choices would be cotton, poly/cotton and linen. Some fabrics may need just a light run of the
iron after the wash.

My whimsical star fabric came from a store I visited this summer. You can purchase this fabric or many other fun fabrics for runners...Link here. They have hundreds of fabrics in countless colors. Pink not your color? This Starry Sky fabric comes in several different colors. Adorable.

My whimsical star fabric came from a store I visited this summer. You can purchase this fabric or many other fun fabrics for runners...Link here. They have hundreds of fabrics in countless colors. Pink not your color? This Starry Sky fabric comes in several different colors. Adorable.

Measure your table. I like a runner that runs the entire
length of a table and drops just a few inches over the edge. If the runner is
too long, the excess may get in the way of anyone seated at the ends. I like a
5” or 6” drop over each end of the table.
Measure the length of your table. My table is 72”
long, I want a 5” drop at each end and I need to include 1” for sewing. 72 + 5 + 5 + 1 = 83. I will cut my fabric 83”
long.

I also like my runners to be a bit wider than a runner purchased
from a store. I prefer a runner that is 17” wide. At 17" wide, stemware can be set on the runner if you worry about water marks or rings on your wood table. Add 1” to the cut width, 18”.
Your cut measurements will be 83” long by 18” wide.

Remove the selvage. The selvage is the edge of fabric. There
will be two, one on each side of the fabric, running the length of the fabric. It is uneven, has small holes and
if your fabric is printed it will have no color or print. It needs to be
removed.

With your scissors, remove the selvage.

Across the bottom of your fabric you may notice the threads
that run across the fabric, perpendicular to the selvages may be uneven because of the way your fabric was cut off the bolt, see
photo.


Lay your straight edge across the width of
the fabric on the back, running the edge as close as you can along a row of thread. Mark a
straight line as shown, and cut along the pencil line.
Now you are ready to cut your fabric to your measurements.


Cut TWO lengths of fabrics 83” x 18”. Why two? Because I
like to line my runner with the same fabric on both sides for two reasons.
First, if the runner gets slightly messy, just flip it over and your table is
undisturbed. Second, if you use any type of fabric on the back that is not
identical in fiber content, it will wash and shrink differently than the face,
leaving one side longer and wider with big wrinkles you cannot smooth or iron
out. You will thank me later.


Match up the cut fabric, right sides (the face, or the print side
of the fabric) together and pin as shown.


Find approximately the middle of one side of the length.
This is where you will make the opening, a no sew area where you will later use
to turn the fabric right side out. Measure for the opening to be about 12”
long. Double pin both sides of the opening.


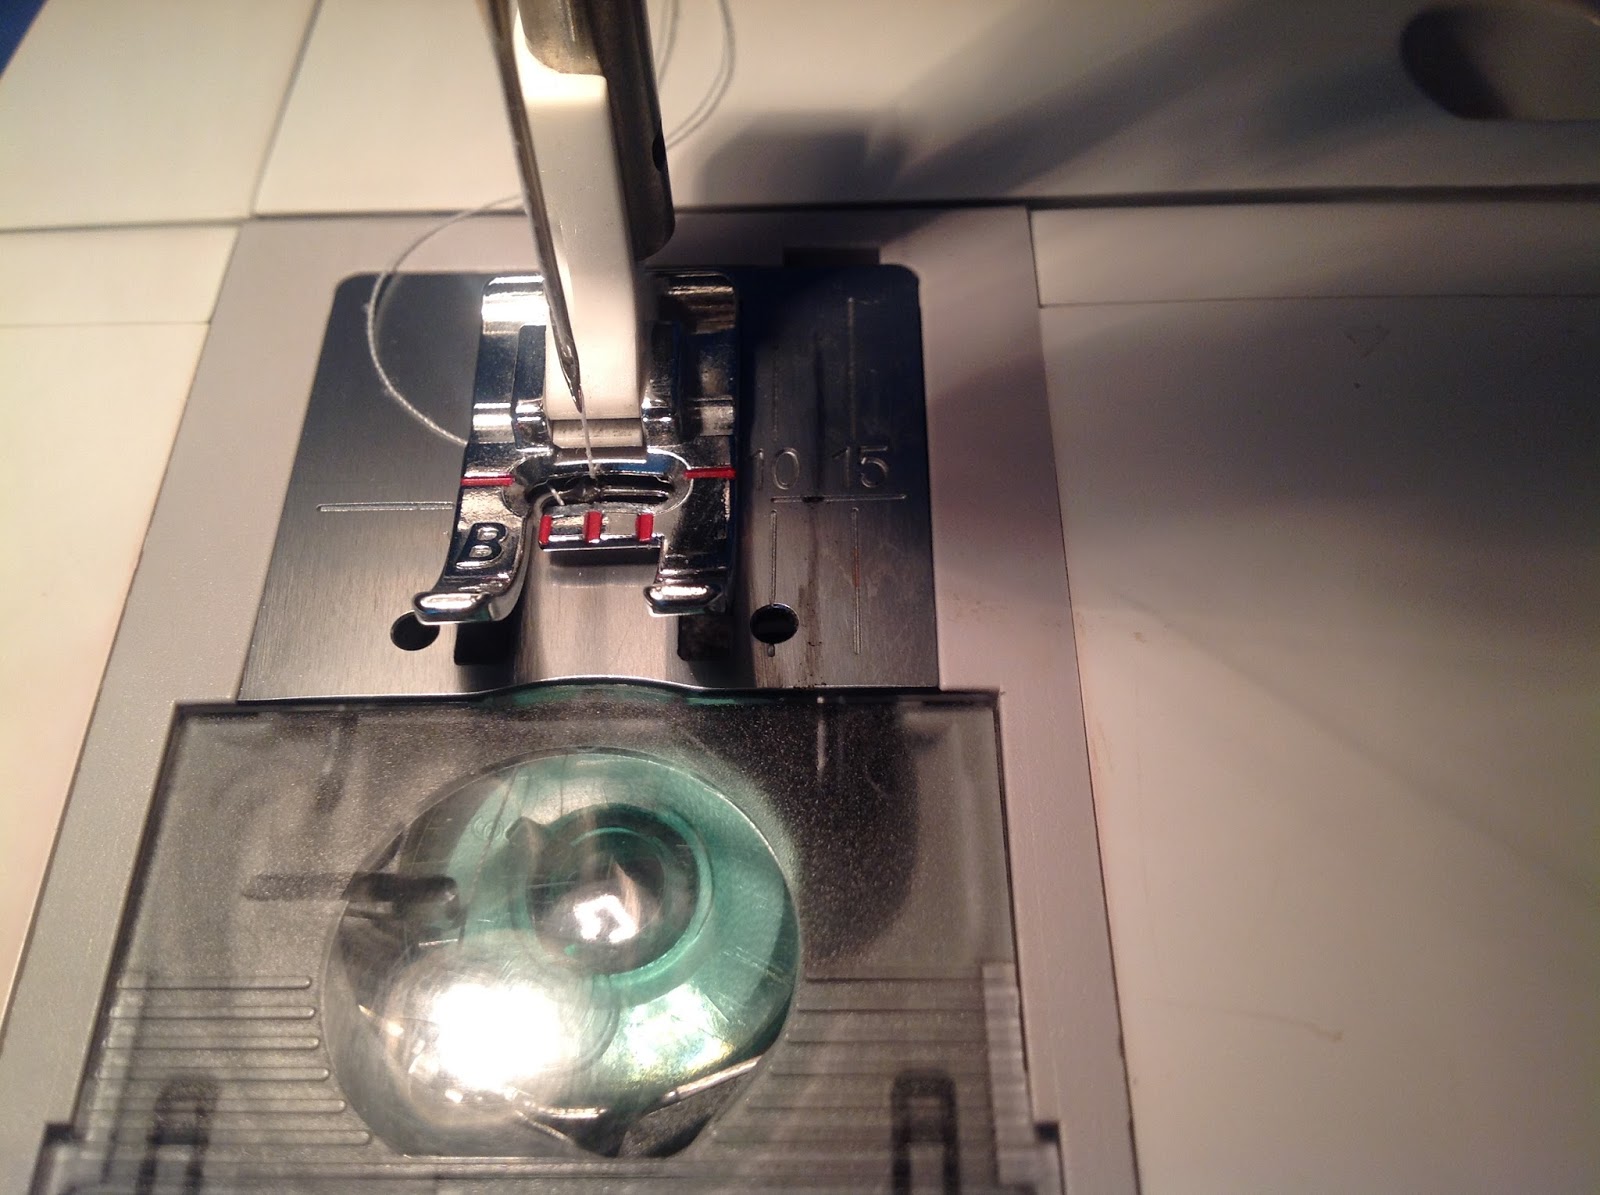
Set your machine for a straight stitch with about 8 stitches per inch (the number 3 on my machine). You would like to have small tight stitches that will press
open nicely. Sew 1/2" from cut edge to make your seam allowance. If you don't have a measured sew line on your sewing machine, use a tape measure and mark with pencil or tape a line 1/2" out from the needle.


Start sewing at the first double pin area. Back tack, or
reverse your stitches about 1” or so to keep the opening from separating. Sew
all the way around the fabric to the last set of double pins. Back tack to
tighten the opening. Stop and remove pins. Do not sew over a pin, it could
damage the needle. Damaged needles can leave holes in your runner and mess up
your machines tension.


At each corner, run 3 or 4 stitches across at an angle as
shown.

Clip off excess material as shown. This is an aid to give the corners a nice “point” and to take any excess fabric out of the corners.


Press all the seams open as shown.


Turn the runner right side out.

Gently slide the screwdriver (or point turner) into each corner
and gently press to make a nice point. Be careful not to push
too hard and make a hole through the seam. And make sure you remove the
screwdriver!

Press all seams flat.
Press the seams of the opening ½” to the inside.


You can hand sew the opening or use your fusible bond
to “glue” the opening shut.

I prefer to sew the opening shut. Fusible bond is a glue
that will eventually wash away. Pin the opening to make sure the seam is
perfectly lined up.


Stitch 1/8” from the edge all the way around. This is called
topstitching. It leaves the runner smooth and has a nice professional look.


One last press and you are done. Simple as that.

Dream it...

Make it...

Beautiful.


0 comments:
Post a Comment