Sometimes it is the rug that defines the space. It can be
the rug that finishes the space. An area rug can be the single most impactful
design element in a room. Or you could just love a good rug. Such is the case
of my outdoor living space. The place I find peace. So what could be better
than a rug to cozy up the place. Great idea, good look. But. My space is a
rustic deck surrounded by trees with little if any direct sunlight. One good
rain and it could take weeks for a rug to dry. Not so nice. So why not a
painted rug to give that same look and feel as an area rug? Paint is
inexpensive, and if later you would like a change all is involved is a little
coat of paint to start over. Sounds intriguing? Follow these steps and before
you know, your outdoor space will be your favorite spot.
Perfect place to rexlax and enjoy the early evening.
This is what you will need-
·
A Large Metal Ruler
·
Tape Measure
·
Painters Tape
·
Exterior Wood Deck Paint, Two Colors
·
Paint Brushes
·
Pencil
·
A Square
·
A Large Straight Edge (I used a super big level)
To begin, I made a full scale paper pattern so I could
decide the exact placement of my painted rug. You can skip this step and
outline an area with painters tape to visualize placement if you like.
My deck has been painted white for years. Every few seasons
it gets a fresh new coat, so I could skip the primer step. If your space is concrete, this technique can be followed, you just need to use masonary
paint.
Using a tape measure, mark the length and width of all four
sides. Use a square to make sure the corners are perfect 90 degree angles. This
rug measures approximately 70 1/2" x 42 1/2". With your large metal ruler connect the four
corners with a pencil to make an outline of your rug. Prime one coat and let
dry. Paint one to two coats of white inside your lines. Let dry a day or two.
 |
| View 1 |
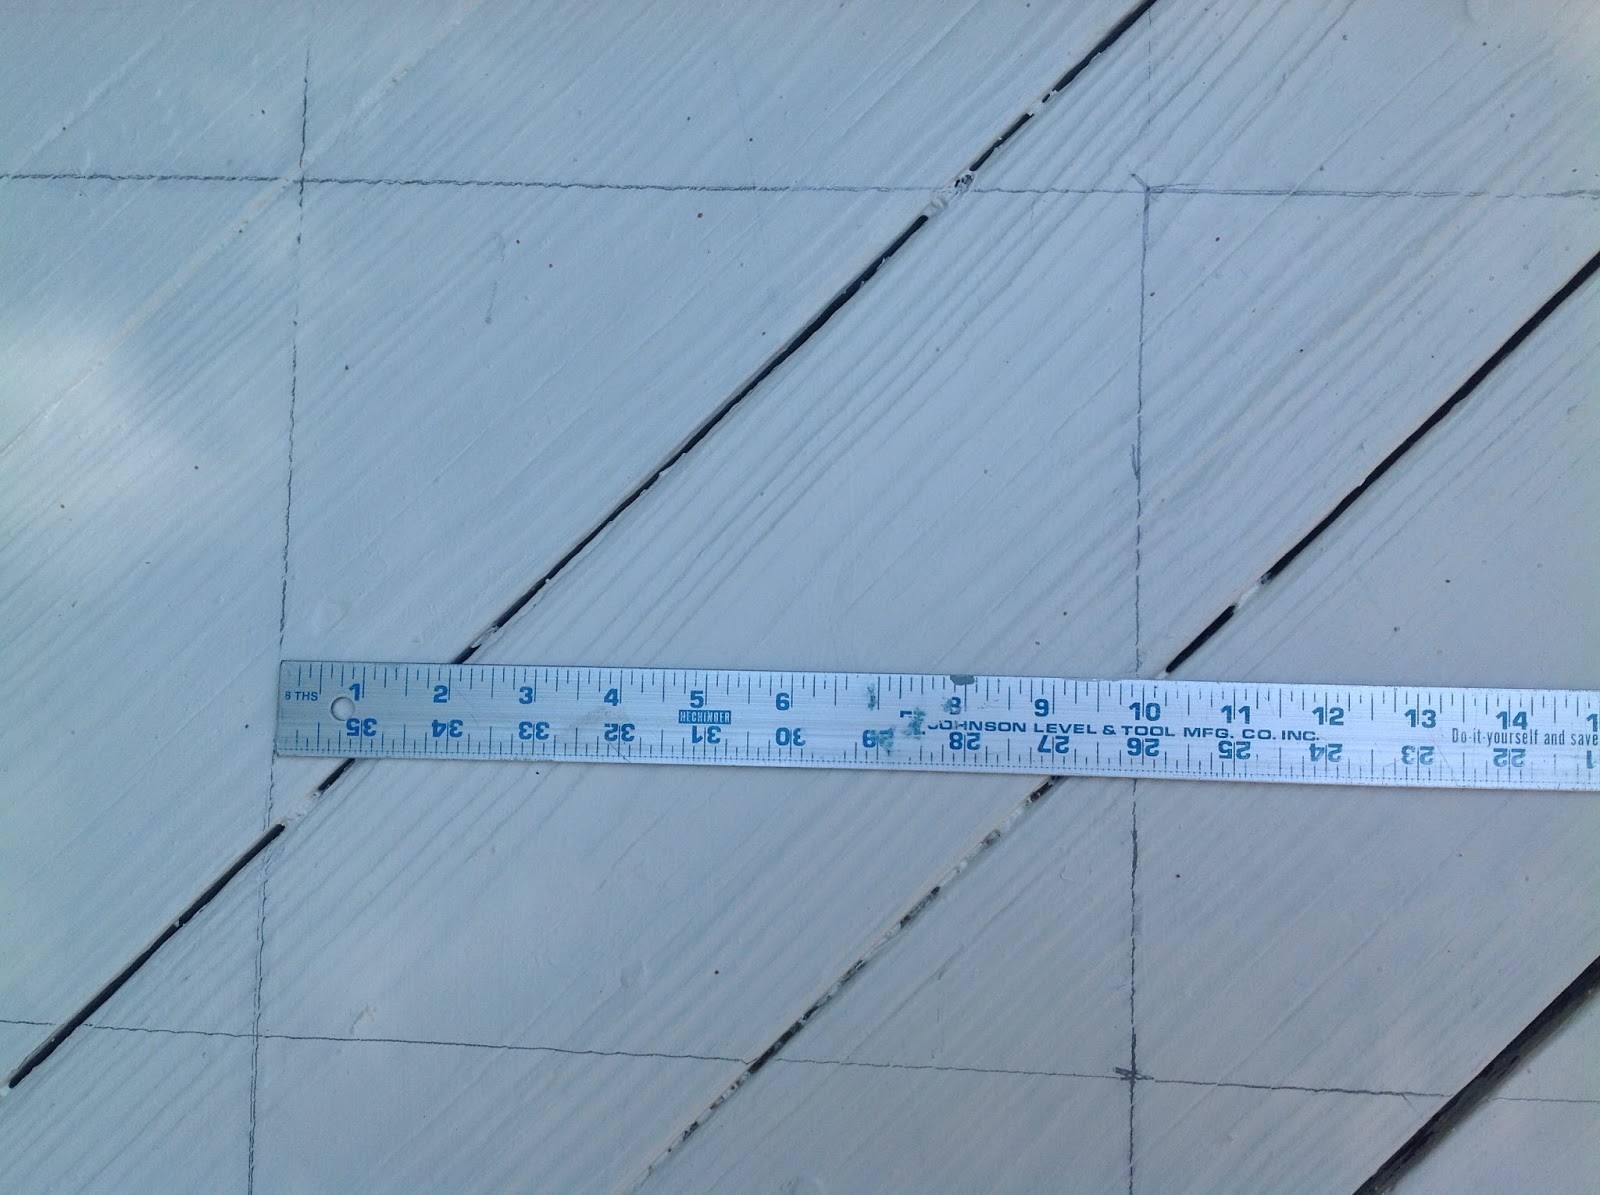
Measure and mark the five points of the diamond on the top
length line and the bottom length line. Measure and mark the three diamond
points on the right with and left width. Follow the paper sketch for
measurements, see photo, view 1
Use the square with the 45 degree angle to mark all of the
diamond points, flipping it to get the right and left side of the diamond
point.
 |
| View 2 |
Use your large straight edge, draw lightly with a pencil to
connect the lines to make a grid as shown on paper pattern, See photo, view 2.
 |
| View 3 |
With you straight edge draw with you pencil all the right
angle lines. See photo, view 3. Make your lines a little darker for
these will be the lines you need to see to tape.
 |
| View 4 |
Next, use your straight edge to draw all the left angle
lines. See photo, view 4.
Randomly measure your diamonds to make sure they are 10”
square.
I marked an “X” on all the diamonds that were to be painted
light grey.
Now you are ready to use painters tape to tape your
diamonds. The diamonds that I will paint grey have the tape on the outside of
the line of the diamond (they are the spaces that look larger in the photo). If you look
closely in the photo you will see the faint “X” in the larger spaces. The
diamonds that have the tape on the inside of the diamond (they are the spaces
that look smaller in the photo). They are the spaces that are already painted
white.
Here is the million dollar tip to using painters tape. When
you first lay the tape on your line, lightly press it in place. Then using your
finger tip, press and slide your finger in one direction the entire length of
the tape to secure. If you are taping over a rough wood surface, firmly press
across the tape to the opening (where your are painting) the direction of the
grain. And yes, this might take a little time, but it will save you all kinds
of anguish later.To paint, lightly dip your paint brush in paint. Begin you
paint stroke on the tape, across the tape and into the space to be painted. The
entire length of the tape. DO NOT BRUSH BACK AND FORTH ACROSS THE TAPE. This can cause the paint to seep under the tape and cause a big ugly mess. Brush
with small strokes, When all sides have been painted,
finish painting the inside space with a larger paint brush.
Once all the grey squares have painted, carefully remove the
painters tape.
Your lines should be clean and straight. Just in case paint
does happen to seep under the tape, use a very small paint brush to touch up.
There was one little spot of paint that was removed when the
tape was pulled up. Easy to touch up later. Let dry 1-2 days.
Now, we transform the deck art into a rug by creating a boarder. When your paint is thoroughly dry, measure for the outside
band. Measure out from the original pencil line 2” on all four sides. Apply
painters tape to the two pencil lines. Make sure all the corners are sharp, you
may have to use scissors to do so.
Paint the band with the above described direction for
applying paint.
Carefully remove the painters tape. Let dry several days
before walking or moving furniture on.
Plan, paint, sip and nap. Heavenly. Mother Nature would approve.