Saturday, September 28, 2019

GOLDEN PUMPKINS

0


Fall can arrive now. I might as well pull out the mittens and sweaters, because I am finally ready. Ready to embrace autumn and all that comes with it. Hard to believe these are words I am thinking from one who is always cold. But, now I have something that warms me from my heart. Beautiful golden pumpkins. A new twist on a gold leaf, but far easier. If you have ever tried you hand at actual gold leaf, it is quite an adventure. It is messy, unpredictable, costly, and no guarantee that the outcome will look nice. I know, I have tried. And, I have failed. But this new technique will have you dipping everything you can get you hands on it is so easy. So pretty. And so autumn.


So beautiful.


This is the spray paint I used. You can use any metallic paint, just make sure it is an oil-base paint, otherwise this technique will not work. It is magic in a can.


Working outside, fill a large bucket with water.

Use vinyl gloves to protect your hands. 


Spray the paint directly onto the surface of the water. The paint will "float" on the surface.


Use a stir stick to gently swirl the paint in the water.


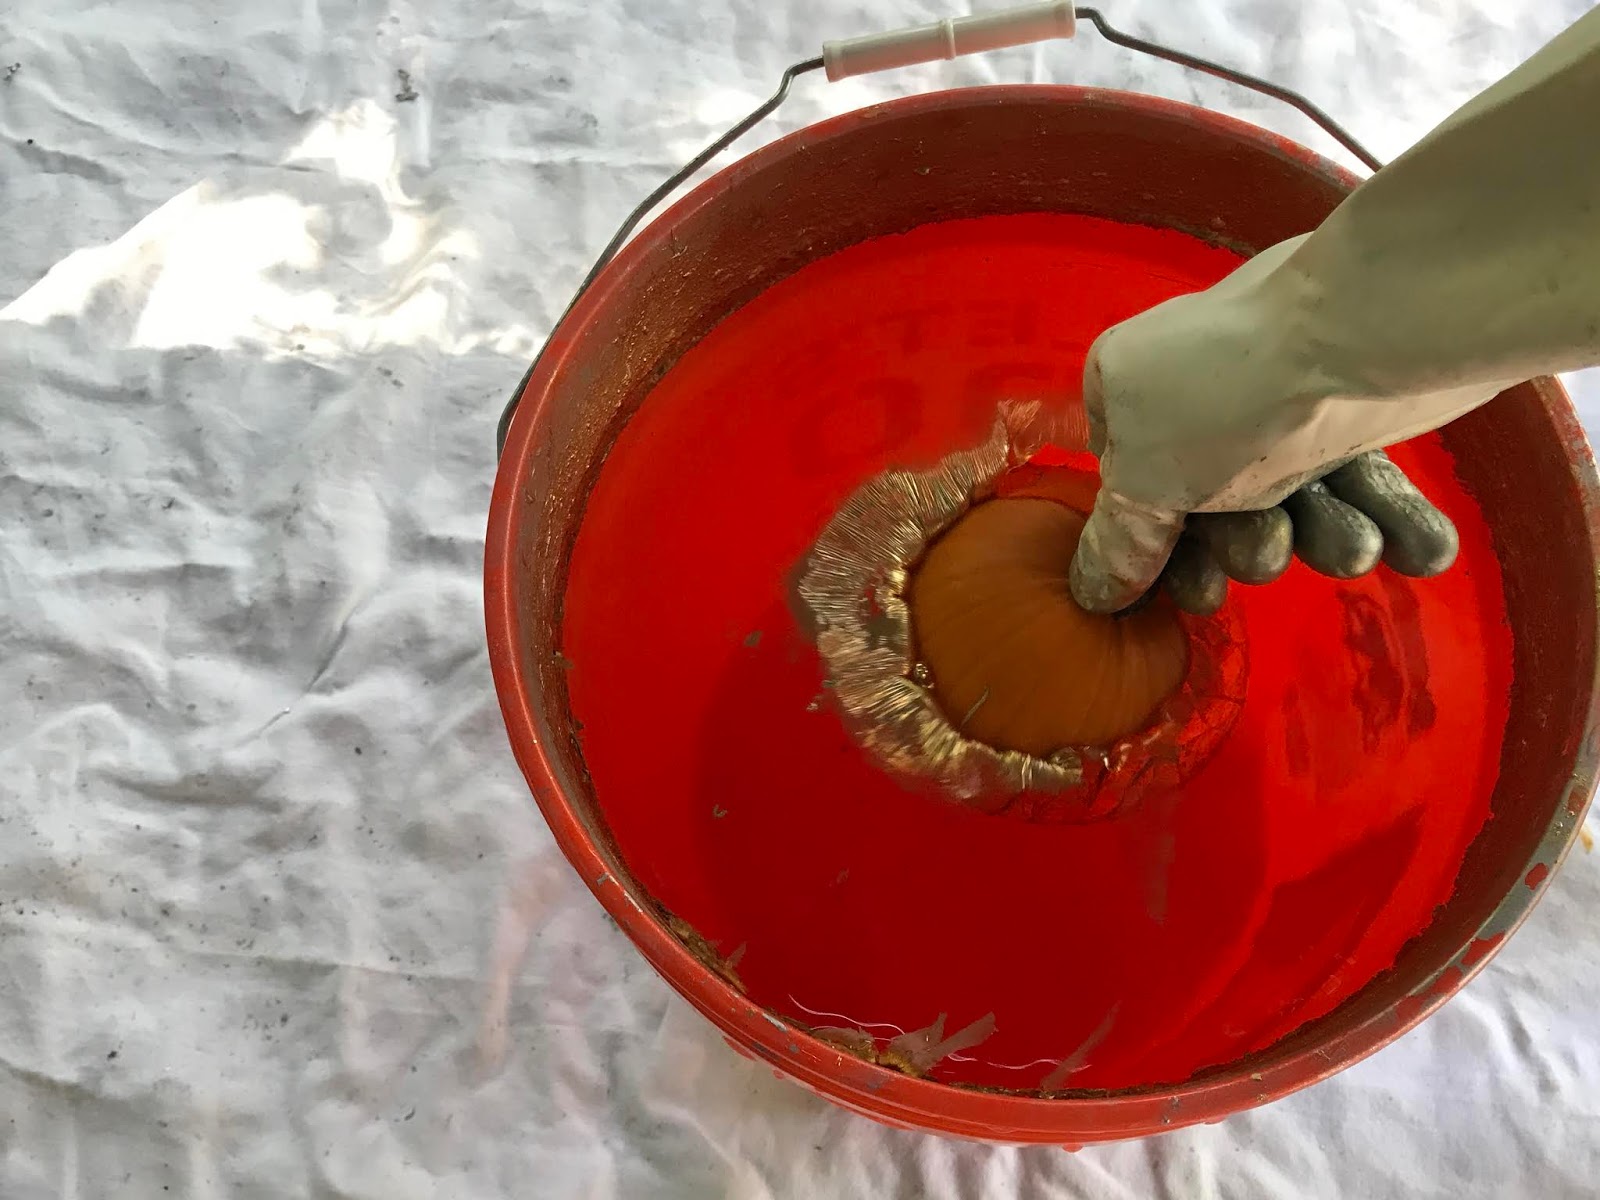
Dip the entire pumpkin into the bucket. If it is a large pumpkin you can dip one side at a time. Wait a few minutes for the new paint to dry, then you can rotate and dip another side.

If there are any ruff spots, bumps or wrinkles, smooth or gently pat them out quickly with your fingertips. Water drops under or on top of the paint will disappear once the paint has dried.


Set you pumpkin out to dry overnight.


If you like the softer hue pumpkins like the the jade, light orange or even white, you can use silver paint.


Fall in love with gold...

Saturday, September 14, 2019

SOMETHING OLD SOMETHING NEW

0


It's early fall. Too soon for pumpkins and witches on my doorstep, but the time is rapidly coming for that. And I will embrace autumn, but not just quite yet. It is still summer at my door. So in the mean time, here is a little transitional decor for my back door, a look that can stay a littler longer post season. Or I can change it every season if I like. A new month, a new look. Something from old made into something new. 


One sunny day this past July, my husband and I were driving through our neighborhood, and, there by the side of the road were a few items left out for give away. I spotted two Christmas topiaries as we were driving by. I had him turn the car around. A rare quality find. A little worn, a few bare spots, and surely, the string lights were not working. Life has passed them by. But not so fast...


Into the trunk they went. 

I quickly assessed what I thought was correct; the lights we no longer working (big surprise), the greens were thin and missing in spots (no problem), no cracks or chips in the planter box (a plus). Perfect. So this is what I did...


The next warm and sunny day, I set them out on a clean drop-cloth.


Snipped off the floral wire that connected the greenery to the frame. Snip snip.


Used my scissors to remove the wires that attached the lights to the frame. 


And before you knew it, I had two, beautiful willow and wire topiaries. A blank canvas.


First I removed all the tags and warnings from the string lights...


Wrapped new lights on the frame...


Used painters tape to cover all the bulbs...


My new favorite spray paint...


And sprayed away...


Removed all the painters tape...


Prepped the planter boxes with spray Kilz. Lightly sprayed and left to dry...


Painted with a good coat of my exterior semi gloss paint...


Measured the topiary with twine to see how long to make the garlands...


Strung some chunky unfinished wood beads on twine...

To purchase beads...Link here.


Wrapped the wood bead garland...


Added a few cotton pods here and there...

To purchase...Link here.


Tied a bow or two...


A rug, a mat...


Stage a cat...


A lantern or two...


A beautiful back porch welcome...


Dim the lights...