
Runners should be fast. And the best runners can do multiple events. This one not only is fast but
cleaver too. A two-sided runner. One look on one side, flip over and you
have a completely new design on the other side. A whole new table with a toss. Perfect for entertaining, or just for every day. Can you imagine the possibilities! Pretty savvy. Follow these few fast steps and you will see just how quick this runner is and how creative you are.


Lay the tile panel out on a large surface and paint with one coat of silver metallic paint. Any interior paint will work. I just happened to have this can lying around from a previous project.


One good coat will work.

Let dry over night then flip over to the back side. You will need a straight edge, a sharpie and a pair of scissors.


Measure 18 1/2" from edge and cut (measure your panel if you choose a different style). Make sure you get the entire boarder on your runner.


I used interior flat wall paint to cover the entire panel. Once covered, I stippled (tap tap tap) the finish with the tip of the brush to give it an old texture look to the paint. An old stiff brush works well.


Great patina.


From Home Depot I found this 2' x 4' Chalk Board board.


Lay the tin ceiling panel on top and mark the length with a pencil.


Carefully lay a strip of painters tape on the pencil line to reduce splinters when cutting. And cut. Perfect edge.


Outside spray a coat of adhesive all over the back of the chalk board runner. Let sit for a few minutes.


Carefully lay the back side of the tin ceiling runner onto the adhesive. You can pick it up and re- center and align the tin panel a few times to get it placed just right. Pat and smooth in place. Let dry over night.


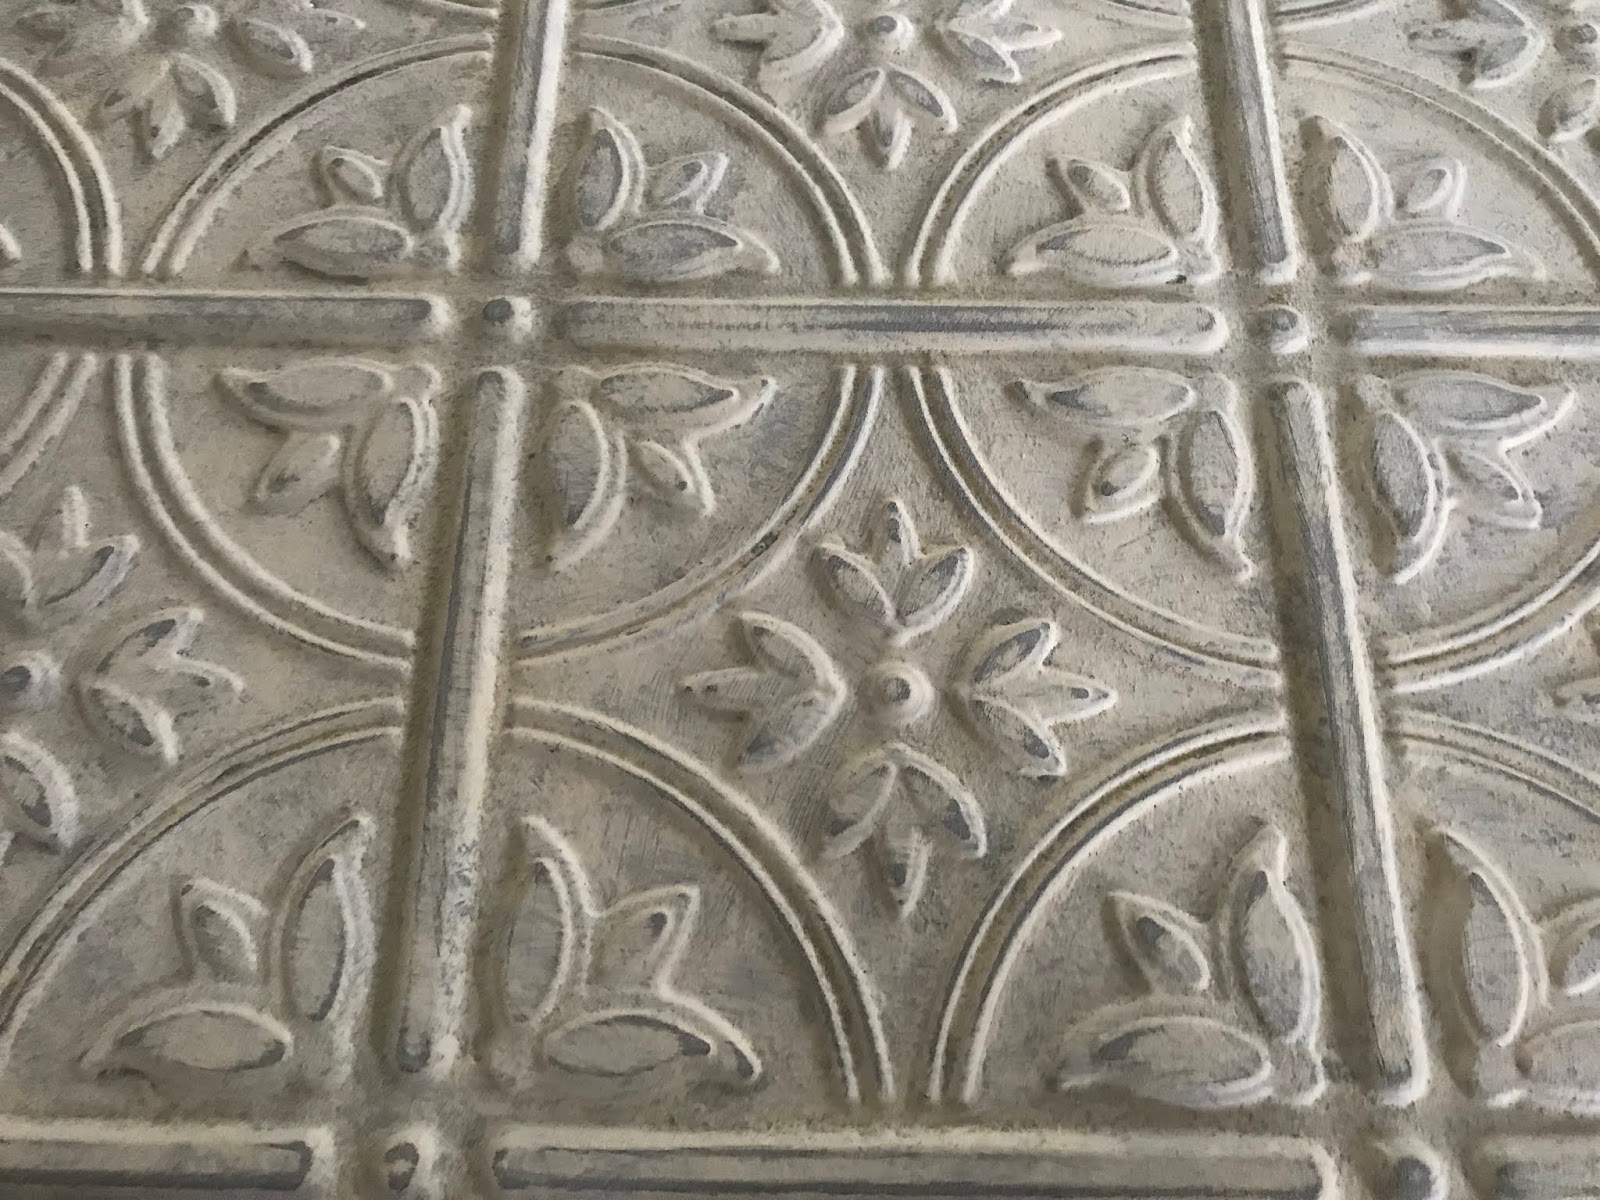

Use a course grit sand paper on the surface and randomly sand the raised features to slightly remove some of the off white paint. Vintage.


Prep the chalkboard with an ordinary piece of white chalk. Cover the entire surface with chalk.


Wipe chalk off with a slightly damp towel.


Let dry. You can buff the surface with a dry paper towel if you like.


One side, then flip for another look-there you have it.


Take your mark...

Get...

Set...


