Saturday, December 31, 2016

CHAMPAGNE CELEBRATION CUPCAKES

0


They say beauty is only skin deep. No so with the most beautiful cupcake ever. Beauty on the outside and inside as well. And it tastes heavenly. What better way to celebrate the New Year or brunch the next day, than with this elegant show stopper. Simple and easy, truly a memorable way to party the New Year. Cheers!


This is what you will need-

Cupcakes...
1 2/3 Cup Flour
1 Cup Sugar
¼ Teaspoon Baking Soda
½ Teaspoon Baking Powder
¾ Cup Butter
3 Egg Whites
1 Teaspoon Vanilla Flavoring
½ Cup Sour Cream
¾ Cup Champagne

Frosting...
1 Cup Butter
4 Cups Powdered Sugar
7 (or so) Tablespoons Champagne
White Pearl Sprinkles
Large Pastry Bag and Large Star Tip


Preheat your oven to 350 degrees. Add cupcake liners to muffin pan.


Blend flour, sugar, baking soda, and baking powder together.


Cream in slightly softened butter, egg whites, vanilla and sour cream.


Add the Champagne and mix completely.


Fill each cupcake liner about ¾ full.


Bake about 16 minutes, or until an inserted toothpick comes out clean. Do not over bake, there should be no slightly brown edges.

Let cool completely.


In a stand mixer, cream butter.


Slowly add powdered sugar to the butter, about ½ cup at a time.


Add Champagne one tablespoon at a time until frosting is creamy but not runny.

Cover stand with a cloth and whip frosting on high for 1 full minute.


Add frosting to a large bag. See post from April 2016, Rainy Day Cloud Cookies for a tearless way to fill the pastry bag.


Start with making a star in the center of each cupcake to provide a base for the frosting swirl.


Follow with a quick counter clockwise swirl around the star once or twice. Finish with vertical pull upwards.


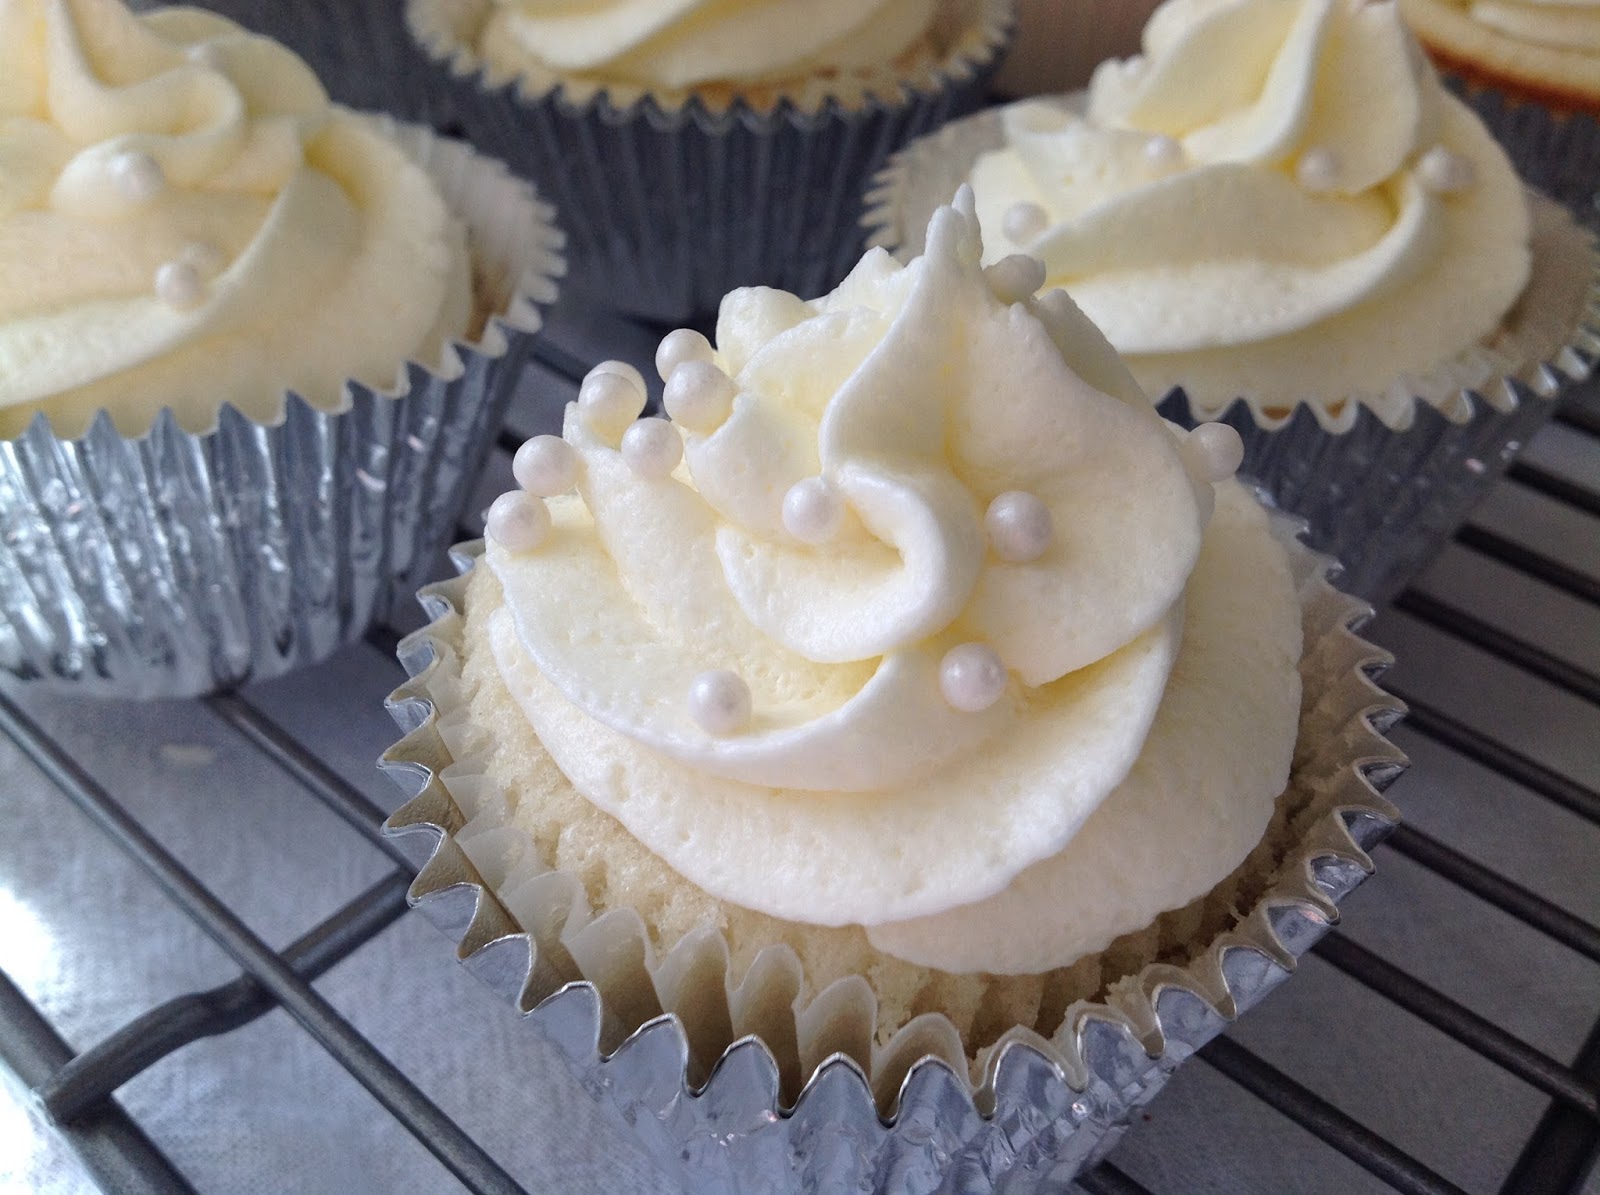
Add white pearls to top.

Refrigerate until ready to party.


And party. Hope it is a fabulous and Happy New Year...Cheers!


Saturday, December 17, 2016

IT'S A WRAP 2

0


You are ready. The house is decorated, cookies baked, cards in the mail, parties attended, presents purchased. The final leg of the Christmas Journey is upon you. Wrapping the gifts. You spent so much time and thought, and now, it just doesn’t seem quite right to throw some ready-made gift wrap onto The Perfect Gift. The Perfect Gift. Seems to reason that a little time, energy and creativity should be bestowed upon wrapping it. Yes, they will adore the gifts, but the real reward is the attention you will receive for wrapping The Perfect Gift. But don’t let on how much fun you had by creating this simple, personal, yet beautiful wrap. Take a bow. Or tie a bow.


Here are a few impactful designs for wrapping that will take no time at all to create.


This is what you will need to design your wrapping paper-

White Craft Paper (or white gift wrap)
Silver Sharpie
Ribbon
Silver Metallic Paint
Pencil
Round Felt Furniture
A Cork

HOLIDAY SCRIPT


Measure and cut a piece of white craft paper a several inches longer and wider than you think you would need for one box.


Practice writing your holiday words on a scrap paper. It doesn’t have to be perfect, in fact, it is so much more interesting if the lettering is imperfect.


And write away, from left to right. I like a slightly thicker line, so I purchased a medium thick sharpie.


Or you could repeat just two words on the diagonal...

SILVER STARS


The Silver Stars paper is a little whimsical. A favorite of mine. 


So fun...

SCATTERING SPOTS


Or you could do mini dots, dip the eraser end of a pencil into the metallic paint and randomly dot away. 


Keep scale in mind for this style. I used a small dot for a small box, but use a large dot for a larger package.


I purchased a felt dot furniture protector, peal off the back and attach the adhesive side to the cork to make a large stamp.


The finishing touch to all beautiful gifts is the Perfect Bow.

Here is how it is done…


Cut a long length of ribbon and lay it across the top of the wrapped gift.


Flip the gift over and twist the ribbon.


Flip the gift over again so the top of the gift is up. With the cut ends, lay them on top, crossing at the middle.


Take one cut end and run it over the crossed ribbon in the middle as shown.


Thread that same cut end under the ribbon where it intersects in the middle.

And pull.


Make two loops, rabbit ears, we call them in my house.


Tie the two loops.


Adjust the ribbon so the decorated side of the ribbon is all facing up.


Pull tight.


Fluff the loops and cut the ends.


Beautiful. Merry Merry. Take a bow.