Nothing says Merry Christmas more than a lighted fresh
spruce garland draped over your front door. Fresh cut spruce, smells heavenly.
Very Christmas.
This simple garland takes no time at all to make. Less time
than baking a dozen cookies. So gather your supplies and bring a little
Christmas to your door.
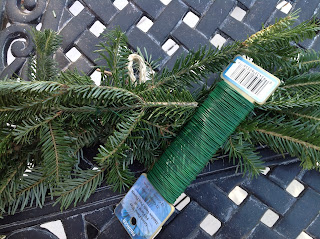
This is what you will need for your garland-
Fresh Cut Branches
Floral Wire, 22 Gauge
Rope
Pruners
The first leg of this journey is to gather you fresh cut
branches. I went to the local Christmas tree vendor in search of the branches.
Neatly stack at the corner of the building, free for the taking, a pile of
fresh cut branches. Or, your local nursery can supply all you need to create
the most beautiful garland ever.
Into the back of the car, as many as I chose to take with
me.
Once home, I sorted and cut the branches into 8” lengths or
so, tips of the branches. Place the branches into a bucket filled with water, outdoors, if you need to create your garland at a later date.
Measure the doorway to determine length of garland.
My garland will be 12 feet long, so I cut the rope a few inches longer to accommodate knots.
At the midway point, tie a knot with a small loop.
My deck is the perfect place to make my garland. Cup hooks
and railing are the perfect place for construction.
Hang the loop of the rope onto a cup hook. These were already in place, hooks designed to hold outdoor string lights. If you have to add a hook, it easily
can be added under the railing, a tiny unnoticeable hole.
Next, string the left side rope and tie around a side railing.
Try to tie the rope so it will be about waist high, so to save your back from
bending over.
Attach the floral wire with a couple of turns around the
middle of the rope at the loop.
Working on the left side of the rope, gather two or three
trimmed branches. With the cut ends touching the loop, wrap the wire tightly around the ends to attach the branches to the rope. Wrap the wire about 2” from the cut
ends.
Without cutting the wire, secure the branches to the rope
with wire by spiraling the wire around the branches, like a candy cane, about
3” to the tips of the branches. Try to slide the wire under some of the
branches to keep the wire hidden. Just one or two turn per bunch of branches.
Take another group of branches, slide the cut ends under the
tips of the branches you just attached, and secure with a few wraps of wire of
the rope.
Continue this process all the way to the end of the left
side of the rope until there is no space left on the rope.
You are half way
there.
Tie the right side of the rope to the railing.
Repeat the process of attaching the branches to the rope,
but reverse the orientation of the branch; cut ends to the left, tips of the
branches to the right.
Cover the remaining rope with the branches.
Take three or four branches, crossed like an “X” and wire to
the center of the garland at the loop to cover any wire or cut ends. You can also add a bow here too, if you like.
Above my entryway, I have 5 cup holders attached to the
frame. Two to the left, two to the right and one in the center.
Carefully transport garland to the doorway. Hang the loop
over the center cup hook.
Continue to attach garland to the remaining hooks. Let the left and right sides of the garland fall along the sides of the door.
At the bottom of the door frame, I have a tiny finishing
nail tapped into the frame, one on each side.
With the wire, attach garland to the tiny nails. This will
help secure the garland from wind, a storm or snow.
Test your outdoor mini lights. Attach to garland, tucking
excess wire into the branches. My lights turn on automatically by an outdoor
timer.
Add a bow or two, ornaments, pine cones, anything you like.
I love the look of the lighted garland through the side
lights of the entryway.
Fresh garland, so beautiful, so simple. Perfect. Very
Christmas.


0 comments:
Post a Comment