Saturday, February 17, 2018

PORCELAIN PLANTERS

0


There is something so exhilarating about doing something you never dreamed you could. White knuckle excitement. That is pretty much how I feel when using power tools. My heart is racing. Rapid breathing. Butterflies. Crossing a boundary you never believed you could do. That is what this is all about, believing in yourself and trying something new. Start with simple and work your way up to bigger and better projects. The hardest part is just getting started. And when you put that power drill down, task complete, it feels like your own Olympic moment. You nailed it…or drilled it. Gold. Need a little excitement in your life? Pick up a power tool. Nothing more satisfying.


So if you find your self looking for a quick and simple Saturday project, here is a good one. Drilling a hole through porcelain. A warm-up project. Once you master this task (and it really is far easier than your can believe) it is onto drilling holes into glass. If you love glass jars and string lights, this is where you want to be. But first, porcelain. Learning to drill holes in glass will follow at a later date. But for now, pick up that drill and get ready for some real excitement.


Yep, they are there. Long forgotten, hardly remembered. If you get up on your tippy toes, you can barely see them. High up on the top shelf, shoved to the back…teacups. Lonely teacups. We all have them. And you can’t even fathom the last time they were used. Me neither. Time to pull these treasures out of the cupboard and put them to good use. Here are a few of mine.


This is what you will need-

Cordless Power Drill
Diamond Mini Hole Saw...Link here
Teacups
Sharpie Marker
Clamp
Spray Bottle with Water
Safety Goggles
Utility Cloth


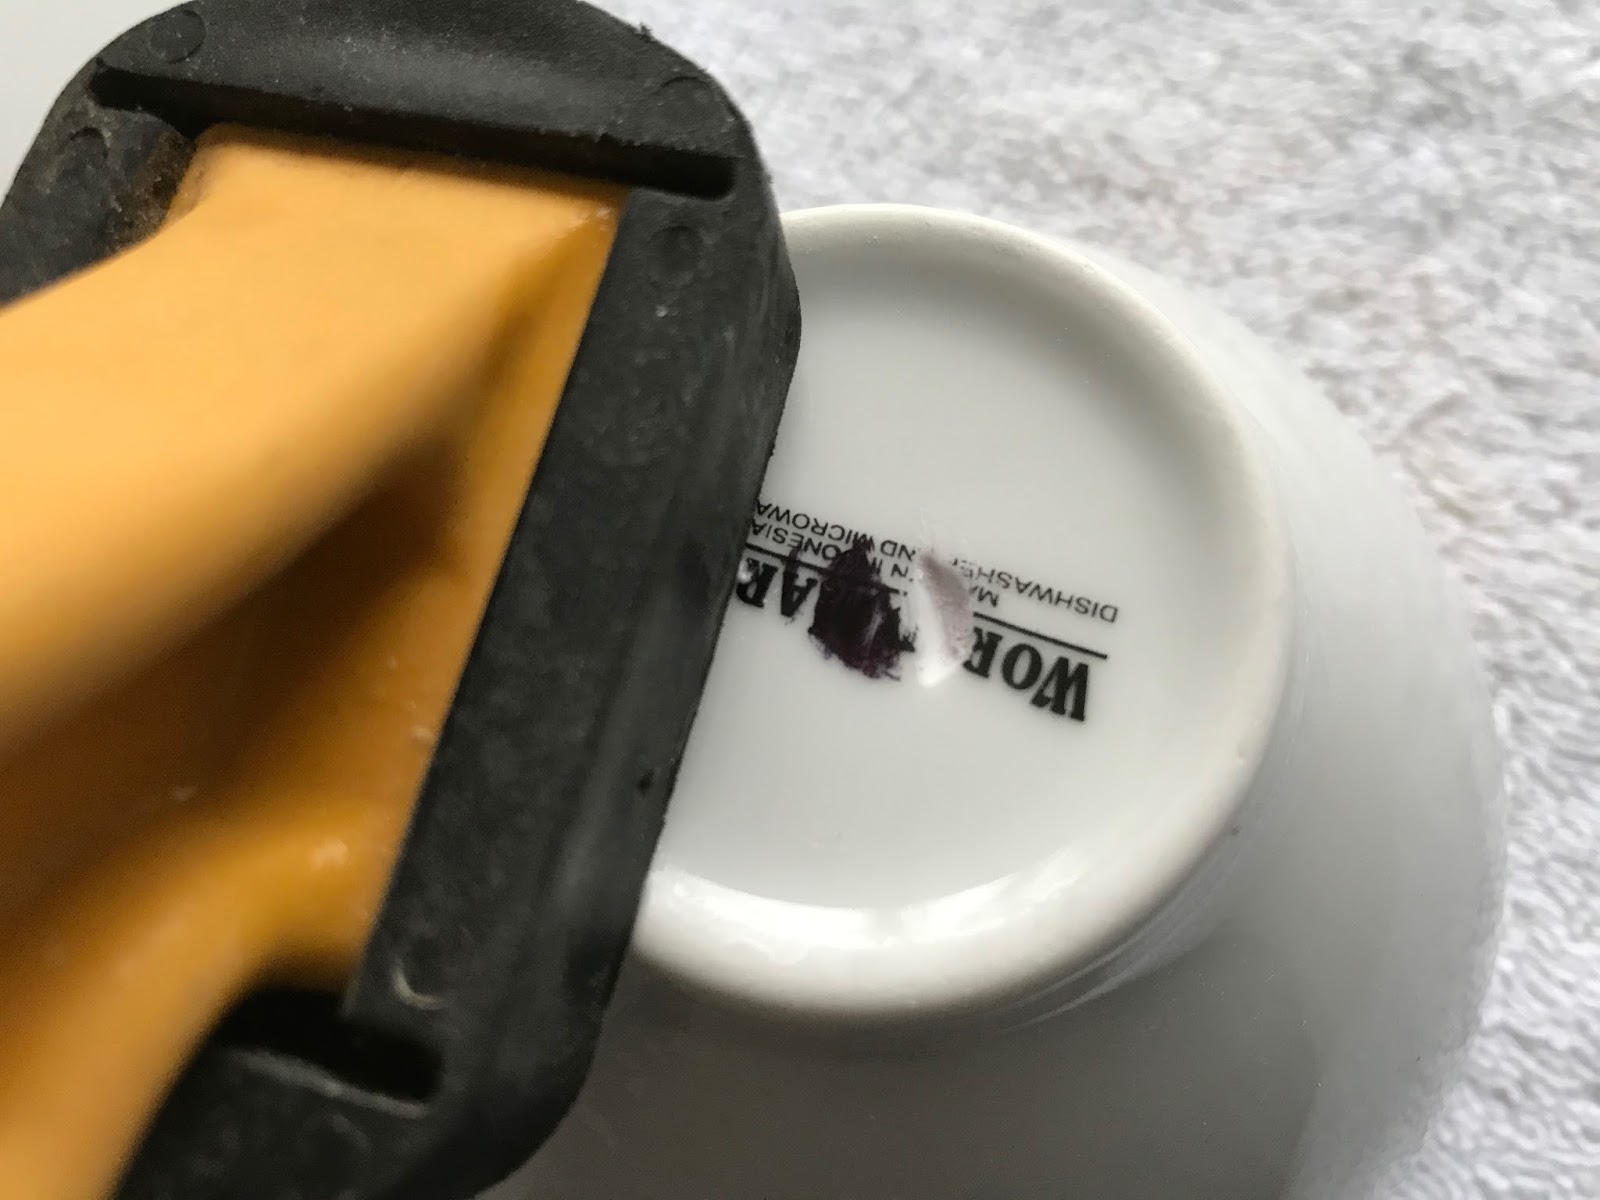
Place teacup on a soft utility cloth. Secure teacup on a work surface with a clamp. Make a dot on the bottom of teacup with a sharpie marker.


Attach hole saw into cordless drill. Put on your safety goggles and pull your hair into a ponytail. Now you are ready.


With your diamond hole saw securely place in your drill, hold your drill at a 45 degree angle and place next to the black dot. Begin drilling slowly, not full speed, holding the drill in place.


Continue to drill (roughly 45 seconds) until a small crescent is formed on the cup. It should look like this. Wipe away any dust from crescent.

Spray bottom of teacup with cold water.


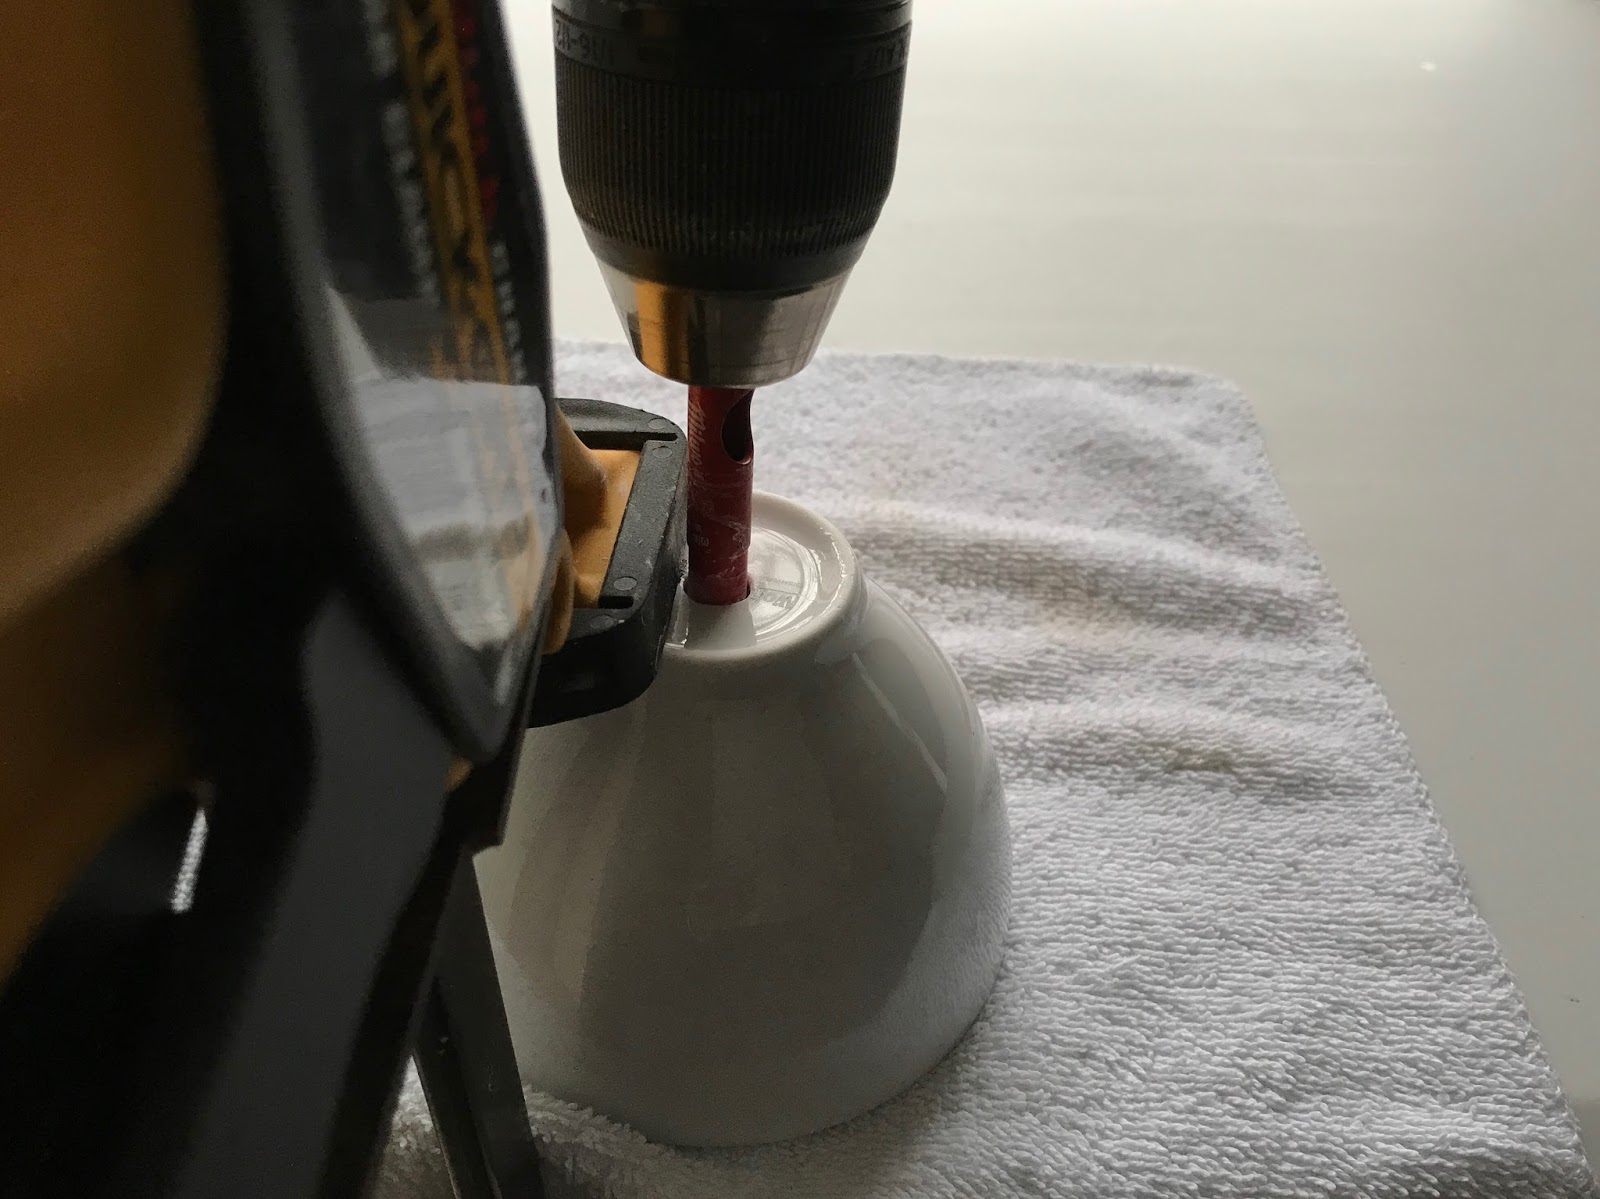
Place drill in crescent and slow begin drilling, holding the drill at a 45 degree angle. Slowly raise the drill up until you are holding the drill at a 90 degree angle.


When the drill is at the 90 degree angle gradually bring up to full speed. Drill for roughly 1 minute. Stop drill and check on progress. Wipe away any dust. You should see a complete shallow ring where the drill has been. This is what it should look like.


Spray the bottom of the teacup with water. Place drill back at the 90 degree angle and begin drilling, starting slowing then bringing the drill up to full speed. Drill for about another minute.


Stop, remove drill. Wipe away any debris. Check on progress, the ring should look deeper, like this.

Spray teacup with water and hold drill at the 90 degree angle and begin to drill, slowly at first, then slowly bring up to full speed.


After another minute (or less) your drill should poke through the teacup. Turn drill off and clean teacup. It should look like this.

Now wasn’t that a big thrill?


In the bottom of your teacup, place a small layer of pebbles or stones.


Add a little potting soil.


Remove plant from plastic container and softly separate the roots from the packed soil.


Place plant into teacup.


Fill  gaps around plant with potting soil.


Place teacup on saucer and lightly water and mist.


Endless possibilities...


Saturday, February 3, 2018

PILLOW PARADISE

0


Pillows. I love pillows. I have them everywhere in my house. Even in my car. They are pretty. They are adorable. They are happy. Pillows are the elements that artistically tie everything together to create a well balanced room. They make a space uniquely yours. Everybody needs them. Pillows are like shoes, the perfect pillow can make the outfit...ummm, room. And not just a few tossed here and there, but every nook and cranny that you can imagine is the perfect spot for a pillow or two. Or a thousand.


What could be more perfect then pillows you ask? Custom pillows. Yes, custom pillows. But can we live with the price tag that comes with custom? Ouch. The beauty of custom is you pick it all, the fabric, the size, the shape, the trim, what every your heart desires. Sometimes you just want that one special pillow that is uniquely you. Or maybe you want to make all your pillows. But what is holding you back? The zipper! Uggh! If you are a little part resourceful and a little part inventive, this might be the best thing you can learn this year. A custom pillow without a zipper.


When you think about it, pillows are just two squares of fabric sewn together. Easy, right? Well sure, if you can sew and know how to set a zipper. Double ouch. Here, if you can stitch a straight line, you can create as many pillows you like without a zipper, easily. Really. Simply.

This easy technique is a great way for beginners to start making your own custom pillows. Setting a zipper is a little tricky and does require some proficiency behind a sewing machine. A zipper is, in fact, the most professional and best looking way to finish a pillow. But, if you are just starting out, or you only want to make one or two, this technique is totally acceptable for a nice custom look for pillows. And once you learn how, you have endless possibilities creating your very own custom pillows. Or just one very special pillow.

This is what you will need-


1 Yard Home Interior Fabric
Down (Or Synthetic) Pillow Insert
Scissors
Pins
Pencil
Straight Edge
Thread
½ Yard Snap Tape...Link here
Point Turner (Optional)

A word about fabrics before you start. If this is a beginning project, may I recommend starting with a solid fabric or all over small dot/geometric pattern that does not have to be matched at the seams (a stripe or a plaid). Plain or simple all over patterns (small random dot like) allow you to measure, cut and sew without the worry of a glaring eyesore at the seams. Also, choose a woven home interior fabric (please not silk for your first). These fabrics usually are designed to hold up to normal wear and tear (pillow fights/naps) and stay nicely in place while not in use. Like a photo in a magazine. Dressmaker fabrics are usually too soft and will make your pillow look frumpy. Sorry, but that's the truth.


You can purchase the fabric for my pillow...Link here. This is a great site for endless pillow fabrics. It is a simple confetti pattern (even thought they are hearts not dots). No matching the pattern. You can purchase your pillow insert...Link here.

Prep your fabric by lightly misting with water and pressing it smooth with an iron.


You will notice that the two sides of your fabric will have small holes running the length of the fabric. This is the selvage.


Turn the fabric over, with a pencil and a straight edge mark the length of the salvage.


Trim the selvage off and dispose.

Lay your fabric on a flat surface with the print (right side) down.


Measure and mark your fabric with a straight edge and pencil. My pillow will be cut 20" x 20". I will cut two pieces, a front and a back. I will use a down pillow insert that measures 20" x  20".


Run a zigzag stitch on all four sides of the front and back fabric. Set your stitches to be as wide as possible and as close together as possible.


This is how I set my machine for these stitches.


Lay your front and back cut pieces on a flat surface with the print (right) side down. Notice the direction of the pattern (this is important). Slide a measure 1/2" at the bottom, fold the fabric and pin. This is the bottom seam for your pillow.


Press seam flat.


Measure 18" of your snap tape and cut.


Separate the tape and lay on the seam as shown.


Make sure both top and bottom of the snaps line up perfectly.


The ends of the snap tape should be 1" away from all ends of the fabric as shown.


Pin snap tape in place.


Change the setting of your sewing machine back to a straight stitch, about 9" stitches per inch. This is how the setting looks on my machine.


Snap your zipper foot in place.


Stitch the length of the snap tape on one side as shown. Back tack at the ends and stop to remove pins as you sew. Do not sew over pins.


Reverse your zipper foot and snap in place.
.


Stitch the length of the snap tape so both sides of the lengths are stitched down.

Repeat directions for the second length of snap tape.


Lay both front and back onto each other with right (print) sides together as shown.


Pin together three sides as shown.


Remove the zipper foot and replace with the sewing machine pressure foot.


Sew all three sides of the pillow together 1/2" away from the edge, back tacking (sewing forward and reverse about 1/2" from the ends to secure stitching.


When you reach the corners, stop and rotate fabric and sew two or three diagonal stitches to make a smooth corner.


Clip excess fabric away from the corners, as shown.


Press all seams. Pressing the seams open will give your pillow a beautiful professional finish.


Turn right side out. Slide a point turner (or a pair of scissors or a screw driver) into the corner and gently push fabric to form a nice corner. Do not push too hard, you do not want to poke a hole in
the fabric.


Stuff insert into your pillow, close the blinds, make sure nobody is looking, and remove tags.


Snap shut and you are finished. Beautiful. And simple. And no zipper.


Endless possibilities...


An empty corner fills a quiet space...


Or a fetching spot to catch a nap...