Pillows. I love pillows. I have them everywhere in my house. Even in my car. They are pretty. They are adorable. They are happy. Pillows are the elements that artistically tie everything together to create a well balanced room. They make a space uniquely yours. Everybody needs them. Pillows are like shoes, the perfect pillow can make the outfit...ummm, room. And not just a few tossed here and there, but every nook and cranny that you can imagine is the perfect spot for a pillow or two. Or a thousand.
What could be more perfect then pillows you ask? Custom pillows. Yes, custom pillows. But can we live with the price tag that comes with custom? Ouch. The beauty of custom is you pick it all, the fabric, the size, the shape, the trim, what every your heart desires. Sometimes you just want that one special pillow that is uniquely you. Or maybe you want to make all your pillows. But what is holding you back? The zipper! Uggh! If you are a little part resourceful and a little part inventive, this might be the best thing you can learn this year. A custom pillow without a zipper.
What could be more perfect then pillows you ask? Custom pillows. Yes, custom pillows. But can we live with the price tag that comes with custom? Ouch. The beauty of custom is you pick it all, the fabric, the size, the shape, the trim, what every your heart desires. Sometimes you just want that one special pillow that is uniquely you. Or maybe you want to make all your pillows. But what is holding you back? The zipper! Uggh! If you are a little part resourceful and a little part inventive, this might be the best thing you can learn this year. A custom pillow without a zipper.
When you think about it, pillows are just two squares of
fabric sewn together. Easy, right? Well sure, if you can sew and know how to
set a zipper. Double ouch. Here, if you can stitch a straight line, you can create as many pillows you like without a zipper, easily. Really. Simply.
This easy technique is a great way for beginners to start making
your own custom pillows. Setting a zipper is a little tricky and does require
some proficiency behind a sewing machine. A zipper is, in fact, the most professional
and best looking way to finish a pillow. But, if you are just starting out, or you only want to make one or two, this technique is totally acceptable for a nice custom look for pillows.
And once you learn how, you have endless possibilities creating your very own
custom pillows. Or just one very special pillow.
This is what you will need-
1 Yard Home Interior Fabric
Down (Or Synthetic) Pillow Insert
Down (Or Synthetic) Pillow Insert
Scissors
Pins
Pencil
Straight Edge
Thread
You can purchase the fabric for my pillow...Link here. This is a great site for endless pillow fabrics. It is a simple confetti pattern (even thought they are hearts not dots). No matching the pattern. You can purchase your pillow insert...Link here.
Prep your fabric by lightly misting with water and pressing it smooth with an iron.
You will notice that the two sides of your fabric will have small holes running the length of the fabric. This is the selvage.
Turn the fabric over, with a pencil and a straight edge mark the length of the salvage.
Trim the selvage off and dispose.
Lay your fabric on a flat surface with the print (right side) down.
Measure and mark your fabric with a straight edge and pencil. My pillow will be cut 20" x 20". I will cut two pieces, a front and a back. I will use a down pillow insert that measures 20" x 20".
Run a zigzag stitch on all four sides of the front and back fabric. Set your stitches to be as wide as possible and as close together as possible.
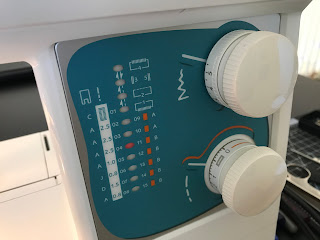
This is how I set my machine for these stitches.
Lay your front and back cut pieces on a flat surface with the print (right) side down. Notice the direction of the pattern (this is important). Slide a measure 1/2" at the bottom, fold the fabric and pin. This is the bottom seam for your pillow.
Press seam flat.
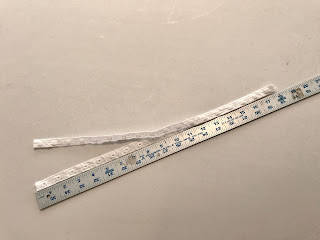
Measure 18" of your snap tape and cut.
Separate the tape and lay on the seam as shown.
Make sure both top and bottom of the snaps line up perfectly.
The ends of the snap tape should be 1" away from all ends of the fabric as shown.
Pin snap tape in place.
Change the setting of your sewing machine back to a straight stitch, about 9" stitches per inch. This is how the setting looks on my machine.
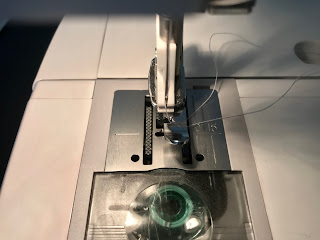
Snap your zipper foot in place.
Stitch the length of the snap tape on one side as shown. Back tack at the ends and stop to remove pins as you sew. Do not sew over pins.
Reverse your zipper foot and snap in place.
.
Stitch the length of the snap tape so both sides of the lengths are stitched down.
Repeat directions for the second length of snap tape.
Lay both front and back onto each other with right (print) sides together as shown.
Pin together three sides as shown.
Remove the zipper foot and replace with the sewing machine pressure foot.
Sew all three sides of the pillow together 1/2" away from the edge, back tacking (sewing forward and reverse about 1/2" from the ends to secure stitching.
When you reach the corners, stop and rotate fabric and sew two or three diagonal stitches to make a smooth corner.
Clip excess fabric away from the corners, as shown.
Press all seams. Pressing the seams open will give your pillow a beautiful professional finish.
Turn right side out. Slide a point turner (or a pair of scissors or a screw driver) into the corner and gently push fabric to form a nice corner. Do not push too hard, you do not want to poke a hole in
the fabric.
Stuff insert into your pillow, close the blinds, make sure nobody is looking, and remove tags.
Snap shut and you are finished. Beautiful. And simple. And no zipper.
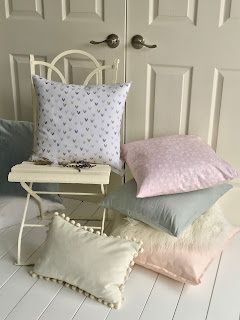
Endless possibilities...
An empty corner fills a quiet space...
Or a fetching spot to catch a nap...


0 comments:
Post a Comment