Saturday, October 28, 2017

HELLO ROSEMARY

0


When you start seeing those cute little rosemary topiary and trees show up at your local food market, you know the Thanksgiving Season has officially begun. Rosemary and turkey go hand in hand when it comes to the most reminiscent of scents. Roasted turkey. Stuffing. Cranberry relish. Pumpkin pie. Rosemary. Nothing smells like Thanksgiving. Nothing. Want to recreate that nostalgic feel of the holiday? Start at your doorstep and welcome all with your very own (it’s surprisingly simple) handmade rosemary wreath. Handmade holiday. Your house, your holiday. Than's what Thanksgiving smells like. Smells heavenly.


Because this wreath is made with fresh rosemary, it will not last forever. The life of the wreath should be a few weeks, give or take. The rosemary can last a bit longer if you mist with water every few days. They may last longer if not exposed to sunlight or extreme temperatures. A dried rosemary wreath is beautiful, too.


This is what you will need-
Fresh Cut Rosemary
8" Wood Embroidery Hoop
Floral Wire
Scissors
Hot Glue/Gun
Ribbon


Start by cutting your fresh rosemary from your herb garden.


Trim each branch into small cuttings, about 7” to 8” in length


Bundle groups of 3 or 4 cuttings together.


With a small length of floral wire about 3” long, wrap the bottom stems together of each bundle.


For this 8" hoop I used 9 bundles to form the wreath.


Lay one bundle on the rim of the embroidery hoop.


Begin wrapping floral wire around the cut ends of the bundle to the hoop.


Spiral the wire around the bundle and hoop.


When you get close to the tips of the bundle with your wire, tuck in a second bundle under the tips of the first bundle, hiding the cut ends of the second bundle. Continue to spiral up the bundle with your wire.


Repeat adding bundles and spiraling all the way around until the hoop is covered.


This is what your wreath will look from the back.


And front.


This silver tray flee market find has just been waiting for the spotlight.


With a little drop of hot glue, I attached the wreath, holding in place several seconds until the glue is firm.


Oooh, this has the makings for a nice centerpiece, add a candle or two and...


I cut a length of ribbon and threaded it through one handle.


Knot the ends.


Hang on an upside-down command hook on the back of the door.


I love a matching satin bow to finish the look.


From door to table...


And every nook in between.


A nice way to transition from the front door to the table, add a couple rosemary votive here and there around the house.


Any cute little jar will work. These have a nice lip that makes a good edge for attachment.


Start with two sprigs, each about an inch or so longer than half the diameter of the jar.


Place a dot of hot glue.


Attach and hold both of the cut ends of the sprigs to the jar.


On the opposite side of the jar, add a dot of hot glue, wrap the rosemary and attach both ends, hold in place until firm.


Easy.


Up the foyer stairs...


To the seating...


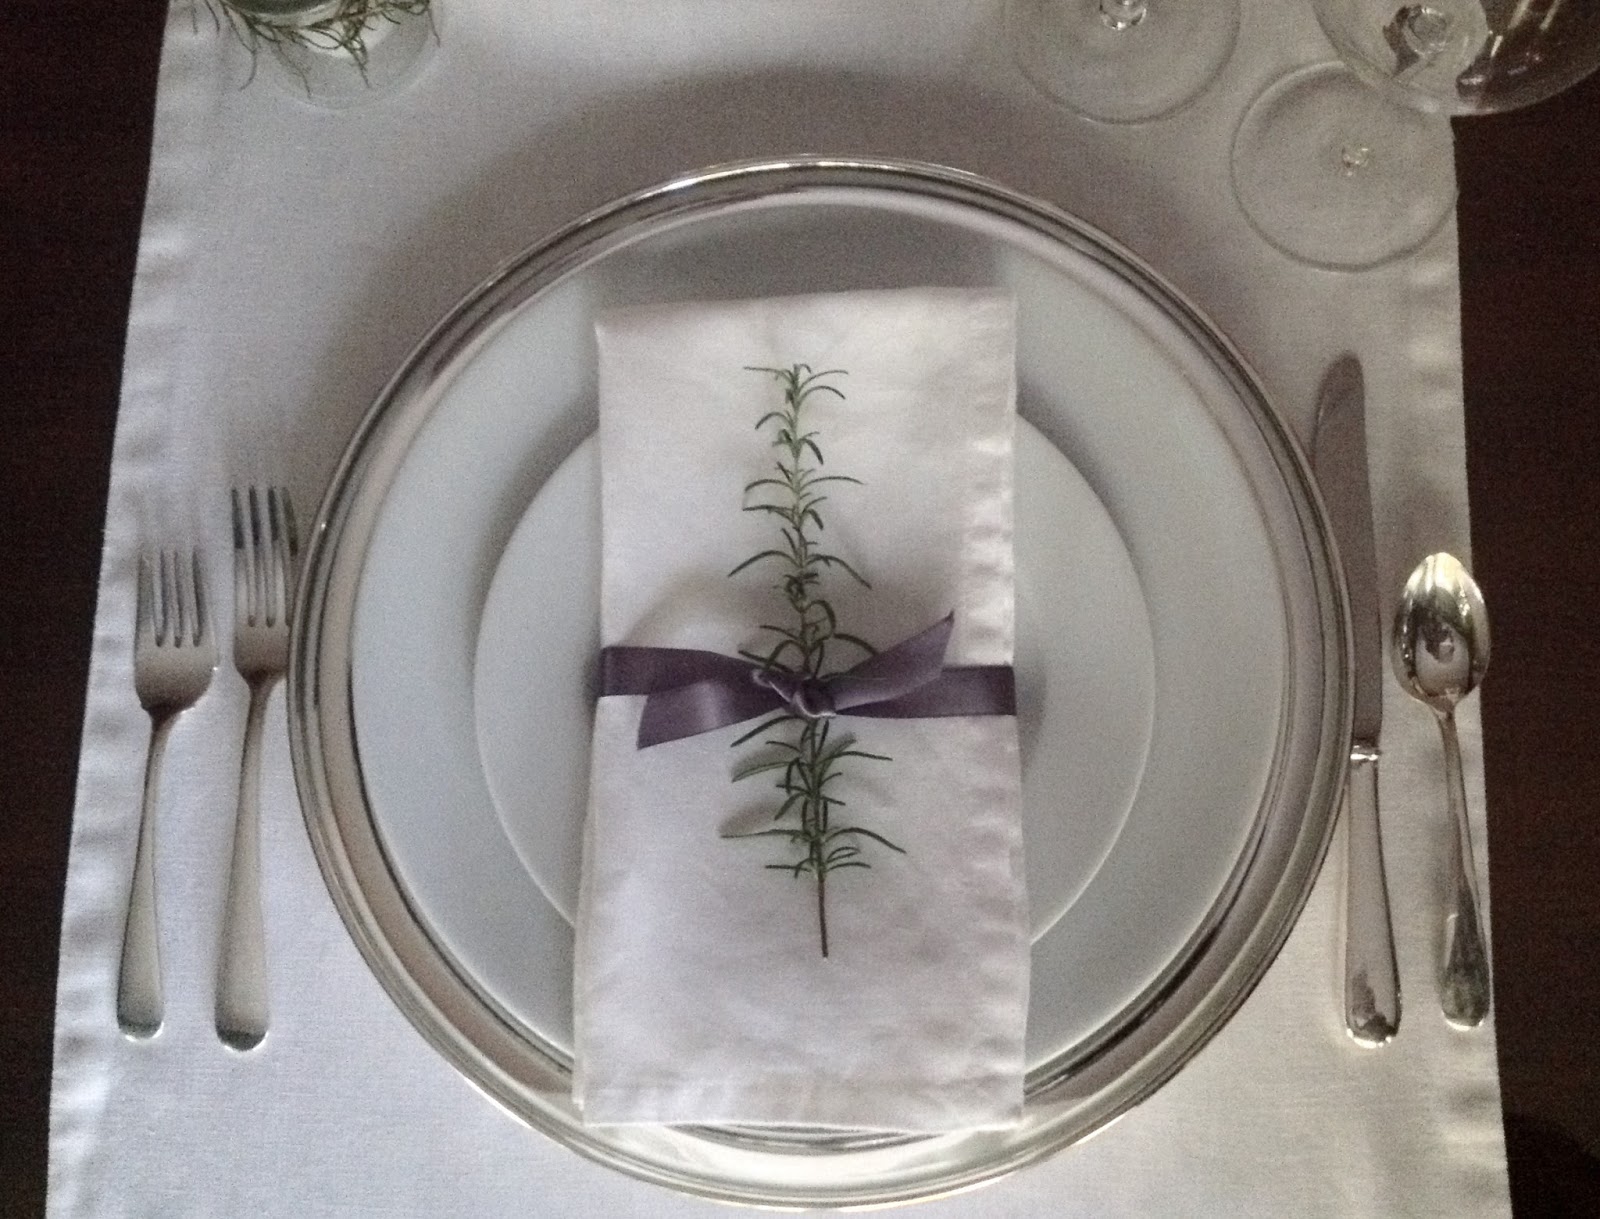
As an accent on a napkin...


Just beautiful. Make this Thanksgiving the most reminiscent of all.

Saturday, October 14, 2017

ELEVATE AND ENJOY

0


Getting organized is work. Sometimes keeping organized is harder than it should be. And no fun. At all. So finding a simple tool that just makes life a little easier is a huge lifesaver. I found this ladder to be most helpful for keeping life in order and most needed belongings at eye level. Simple. Clean. Practical. Good looking. And...at eye level. You don’t have to start at the bottom rung to guarantee climbing to the top of the most organized home in your neighborhood. Immediate success. You might even sleep better at night.


To make this ladder, it takes no special skills, just a few tools and a little wood and a little time. So, grab your tool belt, put your hair in a ponytail and set up the workbench.

Here is what you will need-

Two 1” x 4” x  72" Select Pine Boards
Three 1” x 4' Wood Dowels
Tape Measure
Pencil
Miter Saw
Power Drill
1" Spade Drill Bit
Nail gun
Wood Glue
Square
Wood Clamps
Sand Paper
Semi- Gloss Latex Interior Paint
Safety Goggles


This is all the wood you need.


Mark a line ½” up from the bottom of both side rails as shown. Use your square to draw a tapered line to the edge.


Change your saw setting to 5 degrees to the right. Place the length of your boards to your left.

Safety Goggles.


Cut both bottom edges. This will give your ladder a flat resting edge on the floor when it is leaning on the wall. Small detail, big touch.


Change your saw setting back to 0.


Measure the side rail to finish at 72" and cut.


Sand all edges.


Lay both rails together as shown. Make sure they are both the same length and they are perfectly lined up together. This step is important to ensure the rungs will be parallel.


Starting at the bottom of the side rails measure up and mark 15”. This will be the placement line for your bottom rung.


Use your square and draw a line across both rails as shown.


Now measure 14” up from the existing line and make a mark.


Measure up 12 ½” from that line. Mark.


Measure up 12” and mark.


Again, measure up 12”, and mark.

Use your square and draw a line across each mark onto both rails.


Find the middle of each line and make a mark, this will be the middle of the side rail, placement for each dowel. Mine measures 1 3/4". This will be the center mark for rung placement.

Mark all centers for rung placement.


Measure the dowels at 19” and mark. Cut five rungs.


Clamp your side rail to your work surface.


With your 1” spade drill bit, make a hole into the side rail about ½” deep. Repeat for all rung placements.


Sand all holes smooth.


Make a dry check with your dowels, place one into each newly drilled holes to make sure you have a snug fit.


With one pair of holes at a time glue and place dowel. Repeat for all dowels. You may need an extra set of hands to help so they don’t pop out.


Secure with clamps. Use a square to make sure the dowels are all perfectly in line. Wipe away any excess glue the might spill out.

Let dry.


Once the glue is dry, secure each rung with a nail on the outside of the rail and into the dowel as shown.


Fill each nail hole with wood glue and sand smooth when dry.


Sand all rough edges and surfaces smooth.


Paint one coat of latex primer, and let dry overnight.

Sand lightly with fine grit sandpaper.


Paint two coats of your semi-gloss latex paint. Let dry between each coat of paint.

Sand to smooth if needed.


You could use one in the family room...


One in the baby's room...


One in the exercise room...


One in the bath...


 And one just because Christmas is around the corner. Getting organized is so beautiful.