
Fast. Faster. And faster. Everything is instant. And even
instant is not fast enough sometimes. So here is my take on slowing down and
enjoying the moment…framing a few of your life’s magic moments. Moments to slowly
savor. Reflect. Better yet, framing your moments instantly with my instaframes. Make one
or two to hang in a special spot or make multiples to create a wall gallery and
turn your house into a museum of original art. A museum even the Louvre will approve. All it
takes is an instant.

This is what you will need-
Mirror Frames…Link here
Photos
Tape Measure
Straight Edge
Scrap Card Stock
Craft Brush
Mod Podge
Pencil
Scissors
Ribbon (optional)
E6000 Glue (optional)
E6000 Glue (optional)


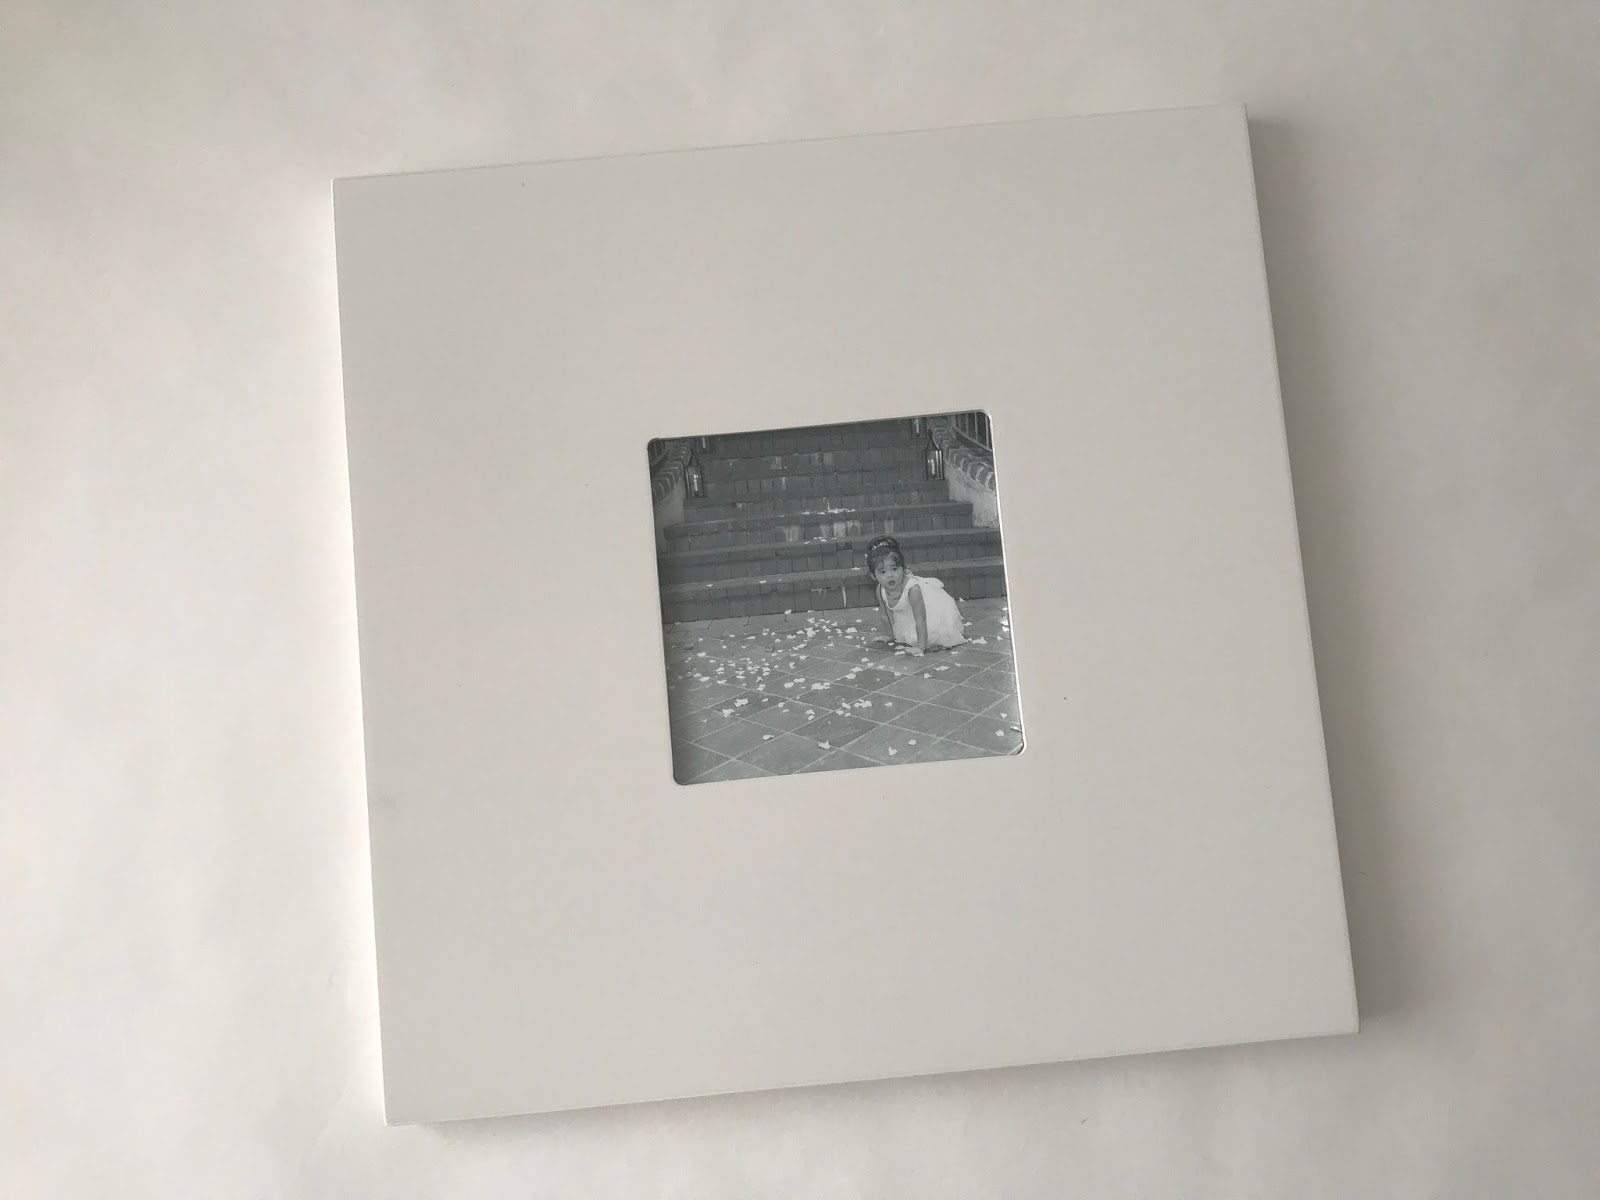
This is the Malma mirror from IKEA. It comes in two colors, measures 10" x 10" and cost $2.00 each. It is beautifully finished and makes an excellent frame that can look smashing in any style home decor. Perfect.

Measure the opening of the frame (mirror), it should be
about 3 5/8” x 3 5/8”.


On your scrap card stock, using your measurements make a template.


Cut the template out.

Place your template over the mirror to make sure it lays
flat and fits smoothly inside the opening.

Take your template out of the mirror/frame. Measure 1/4" in on all four sides of the template. Connect with a straight edge to form lines.
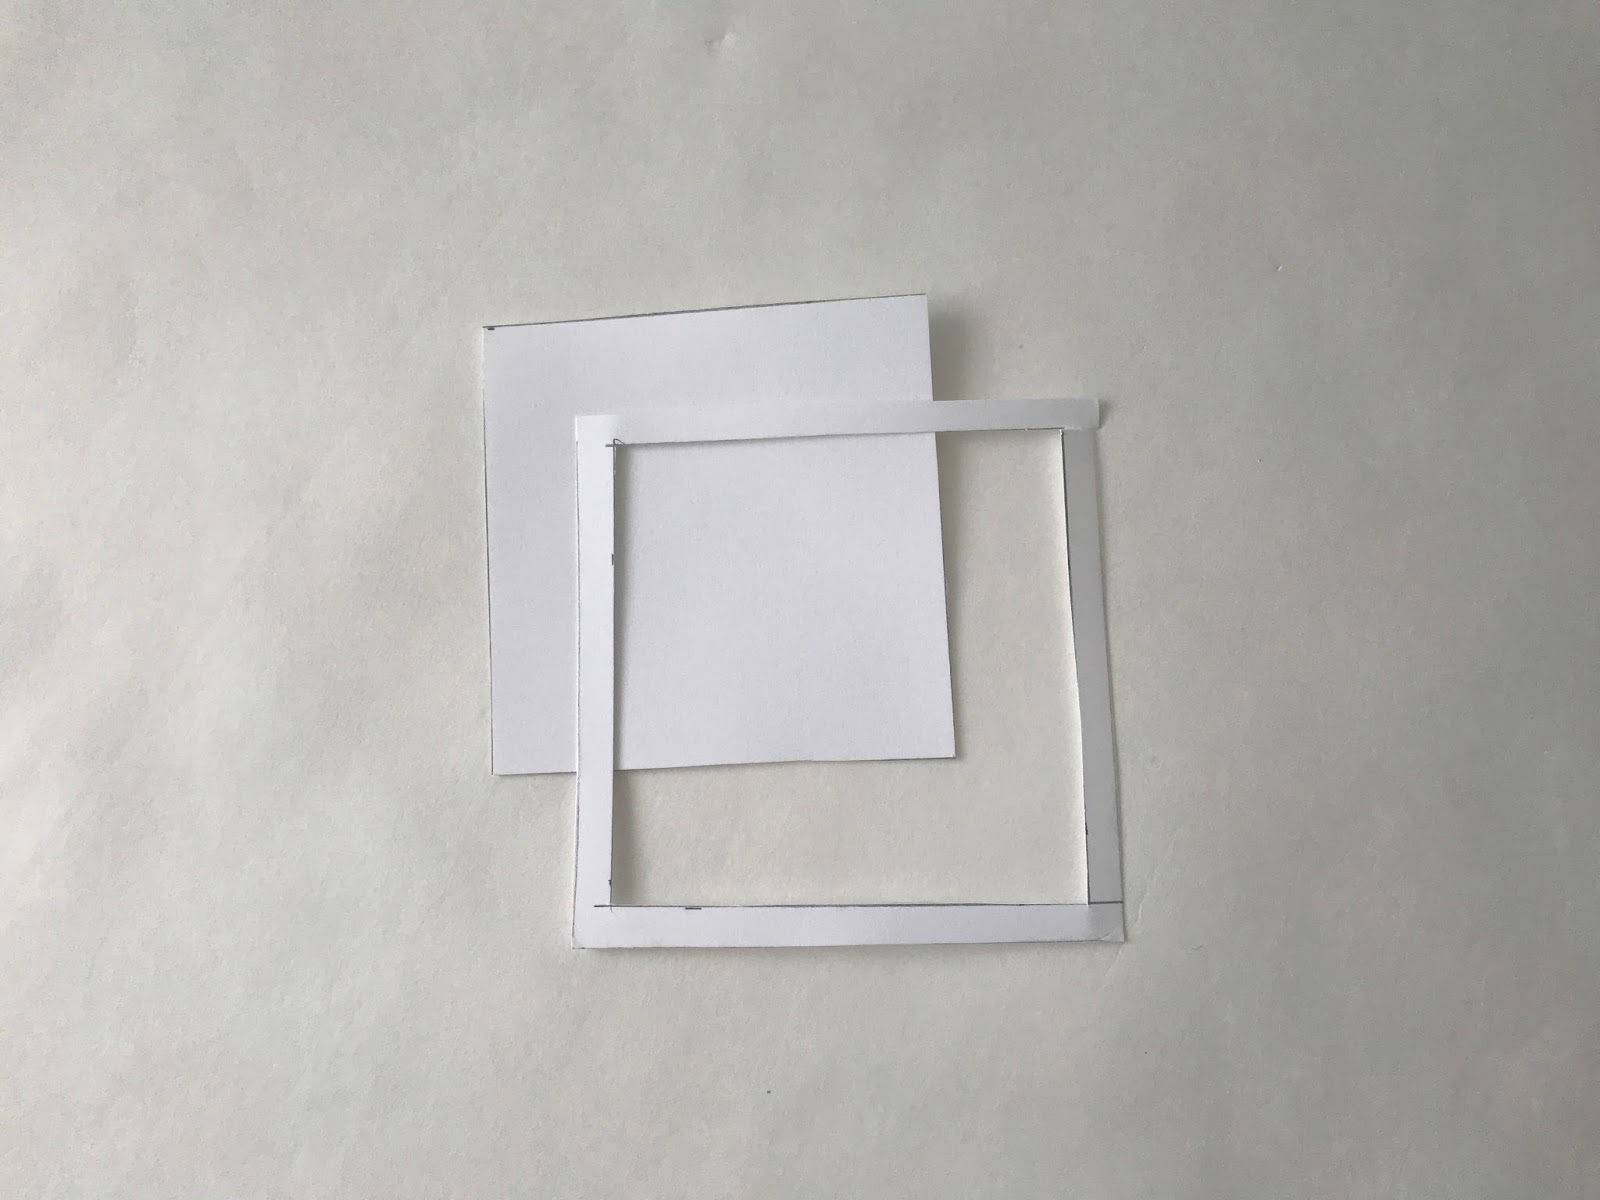
With your scissors, cut out the center, along the lines and
discard the inside. This will become your “frame” or guide to help you center and crop your photos
before you cut them out.

Select the photo.

Move your template around on top of the photo until you are happy with the newly framed photo.

Trace a light pencil line around the outside edge of the card stock.

Trace a light pencil line around the outside edge of the card stock.

With scissors, follow your pencil line and cut out photo.

Lay the photo back inside the frame, over the mirror to make sure it fits.
Lay the photo back inside the frame, over the mirror to make sure it fits.

This framing technique is an excellent tool for cropping photos.


Remove photo from frame. Paint a generous layer of Mod Podge (or clear drying craft
glue) on the mirror.

Lay your photo onto the mirror, smooth in place. Hold for a
few seconds. Let dry completely.


Measure two lengths of ribbon 18" and cut.

Turn your mirror/frame over to the back side. There is a single hole opening at the top if you just want to hang the frame without ribbon.


Measure 1 1/2" over from the edge and 1"down from the top and make a small dot on both the left and right side of the frame.


Work in a well ventilated space with the E6000 glue. Place a small amount of glue on both dots.

Wait a few minutes, then place ribbon as shown.


Flip ribbon up. Press down lightly for several seconds to hold ribbon in place.
Let dry several hours, overnight is ideal.

Tie ribbons together and hang.


Or three...

Or more...

Magic moments in an instant.


❤️❤️❤️❤️
ReplyDeleteThanks! I think you can use a few of these...!
ReplyDelete