
Overnight guests! Oh no! Or maybe not with a little planning ahead. Could be a good time to do a mini make over for the guest room. I wanted to make a guest bed that was beautiful and
luxurious. I recently had the hall bath renovated, and the
guest bedroom adjacent to it was needing a little update. The walls of the
guest room had been painted a beautiful warm coffee color (Restoration Hardware
Cappuccino) and I didn’t want to change the color. The new bath walls are
painted a pale blue-gray, and I wanted to bring that color into the bedroom to
tie the two rooms together. The easiest solution, new bedding. Nothing like
fresh, crisp bedding. So here is what I did to make a beautiful new fluffy,
guest friendly, the Ahhh Bed. The guest room that your guest will never want to leave!

Here are a few bedding basics I use-
*Feather Bed- a big feather filled layer that is placed on
top of the mattress, similar to a pillow top on a mattress.
*Pillows- Standard (20”x 26 “) Euro (26 “x 26”) King (20” x
36”).
*Comforters-Decorative (fluffy down filled or synthetic fiber
filled) “blanket”.
Insert (plain down
or feather filled or synthetic fiber filled) “blanket” that is tied inside of a
duvet.
*Duvet- a big decorative “pillow case” used as a blanket, designed to hold an insert comforter and that insert comforter can easily be removed for laundering the duvet.
*Quilts- cut pieces of fabric sewn to create patterns, or
solid fabrics that have been hand or machine stitched with layers consisting of
a top, a thin layer of fill and a back. Used as a blanket or decorative cover.
*Mattresses-Twin, Full, Queen and King.
Here is the list of bedding products that I am using for a
Queen bed-
*Queen size Feather Bed
*2 Queen down insert comforters
*1 King down insert comforter
*4 Standard feather pillows
*2 Euro feather pillows
*1 Queen Duvet and 2 matching Standard Shams
*1 Queen decorative comforter and 2 two matching Euro Shams
*1 Queen Sheet Set- 1 flat, 1 fitted and 2 pillowcases
* Decorative throw pillows and decorative throw
If you have a King size bed, change all duvets, comforters
and inserts to King and use 3 Euro Shams instead of two and replace the two
Standard Shams to King Shams.

Here is the link where I purchased these items.
When purchasing the new bedding, I kept the two colors in
mind (blue-gray and cappuccino). I found a textured pale blue-gray decorative
comforter and two matching Euro Shams, a duvet with a blue-gray swirl pattern
with a touch of the cappuccino color on an ivory background and two matching
Standard Shams. Perfect.
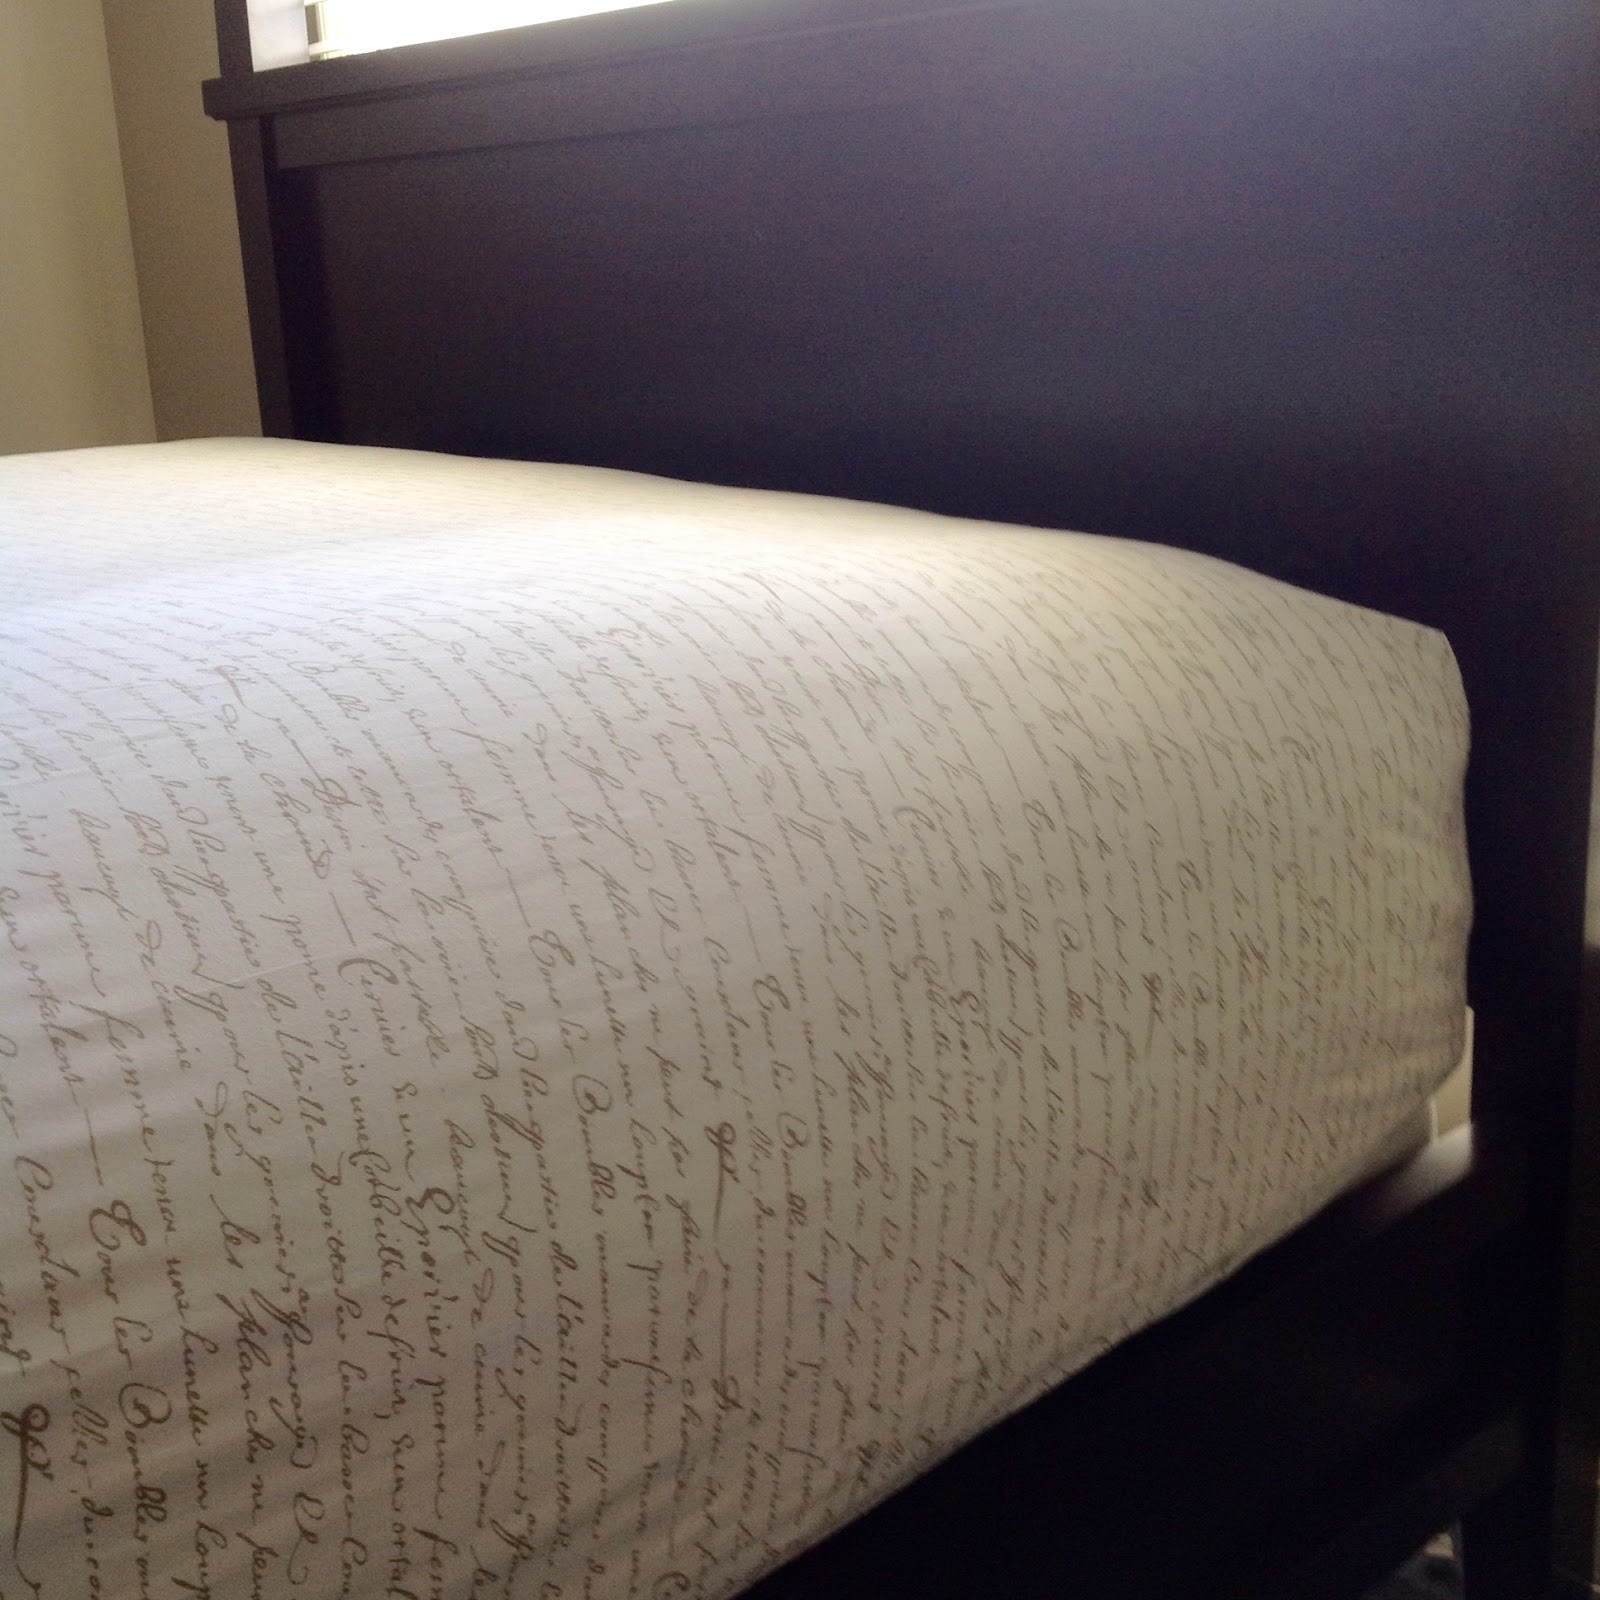
The sheet set I am using was purchased several years ago (new-barely-used
condition) that has a light coffee color script print that I thought looked
nice with the walls. And I love them. Nice combination of color, texture, large
scale pattern and small scale pattern.
Here is how you start layering the fluffy bed. Lay the feather bed on top of the bare mattress.

Place the King insert comforter on top of the feather bed,
tuck excess under the mattress.

Cover this layer with the fitted sheet, tucking the insert
under the sheet and mattress. Looks like a big burrito.


Lay the flat sheet over the fitted, the finished side down.


Place the top of the decorative comforter about 12” to 14”
from the headboard.


Carefully tuck the foot of the comforter and sheet together
under the mattress. Fold the side ends with
hospital corners.

At the top of the bed, fold the fitted sheet down over the
comforter. Smooth out. Now tuck remaining sides of the comforter and sheet
under the mattress.


Filling the duvet. This is a whole lesson by itself. And a
workout. Lay the duvet on the bed, opening side down toward the foot of the
bed. Reach inside and find the upper
right corner and bring it to you through the opening. There should be two ribbons or twill tape in
the corner. These are used to anchor the
duvet and inserts together and to help the inserts from shifting around inside
the duvet. If your duvet does not have ties, simply sew ribbon or twill tape in
each corner. If you do not sew, probably
your dry cleaner has a service to do that for you. I use two inserts inside the
duvet. Yep, two. This bed is mostly about presentation and one insert is not
enough to fill and create a really fluffy, plump look. It will be folded at the foot of the bed and
may be used for an extra sleeping layer. You can also turn down the air conditioner.
Take two corners and tie them to the duvet. Some duvets have loops in the corners and you can run the ties thru
them. Mine did not so I sewed plastic
drapery rings on to the corners to secure the inserts.


Carefully, find the left upper corner and find the
ties. Secure the inserts. Push both corners back inside and slide the
inserts inside the duvet. You may have to reach under and pull the back side of
the duvet down. Stuff the bottom right and bottom left corners of the inserts
inside the corners and tie. Button, zip
or tie (depending how your duvet is made) the opening.


Pillow layering. In design, some prefer the “less is more” (me, most of the time), but, here, “more is better”. How many different pillows can I add to this bed? Usually eight, sometimes more. Sometimes more. And I change them frequently. And, yes, at days end they all end on the floor for the night.
So, place the two Standard pillows in pillow cases and lay them up next to the headboard. These are sleeping pillows. They stay on the bed.

Place the two Euro pillows next. They will match the comforter that is already one the bed.

Then the two Standard pillows. They match the duvet.

Time for throw pillows. Icing on the cake. I have chosen a
pale blue pillow and an ivory pillow with a monogram. A little nod to all the
colors. I added a decorative throw, too. So beautiful.


I just want to take a running leap and land in the middle. Great
place to take a nap. A most inviting presentation for guests. I hope you will
run home and make the Ahhh bed too. And your overnight guests will never forget. Sweet dreams!


Thank you for this blog! You have made projects so simple to complete by talking us through the process with photos and instructions that make the work foolproof. Now I am excited to begin work on my home's entrance for the hoilday season.
ReplyDeleteThank you for your kind words.Good to hear you are inspired! Have fun with your front door, enjoy!
ReplyDelete