
January Blues. Feels like the darkest and gloomiest month of the year. A month that you just want to close the door and stay inside. All month. But you
can brighten up the blues with a few of these winter village night lights and not
even think of the cold outside. Tea light size, warm glow, cast a starry air on your night creating all the ambiance needed for a toasty and cozy
evening. Scatter a few of these darling lights around any little nook that needs brightening. Instant comfort. Uber charm. Solace. Light a few winter village luminaries and a
fire, maybe a little romance will follow. And if you are lucky, maybe it will even snow!

This is what you will need-

Winter Village Template
Card Stock
Scissors
Knife
X-Acto Knife
X-Acto Knife
Rolling Pin
Mini Star Cutter...Link here (Optional)
Glass Jar
Small Craft Brush
Water
Battery Operated Tea Lights
Extra Fine Sandpaper
Extra Fine Sandpaper


My little glass jars...pull the label off, clean, and you have the perfect size glass for a votive. You can use any similar glass jar, just measure the diameter to make sure the template will fit. If your glass jar is slightly larger or smaller, directions to make adjustments will be addressed later.

Your template should be 9 1/2" long by 3 7/8" high.

Download Winter Village Template.


Print template on copy paper and cut out just the outline (not the windows and doors).


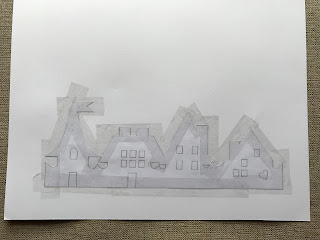
Tape all edges onto the card stock.


Place paper over a cutting surface, like this small black kitchen cutting board. With your X-Acto knife, cut out all the copy paper windows, doors and heart.


Using the cut opening of the paper template as a guide, press firmly and cut out all openings of the card stock with the X-Acto knife.


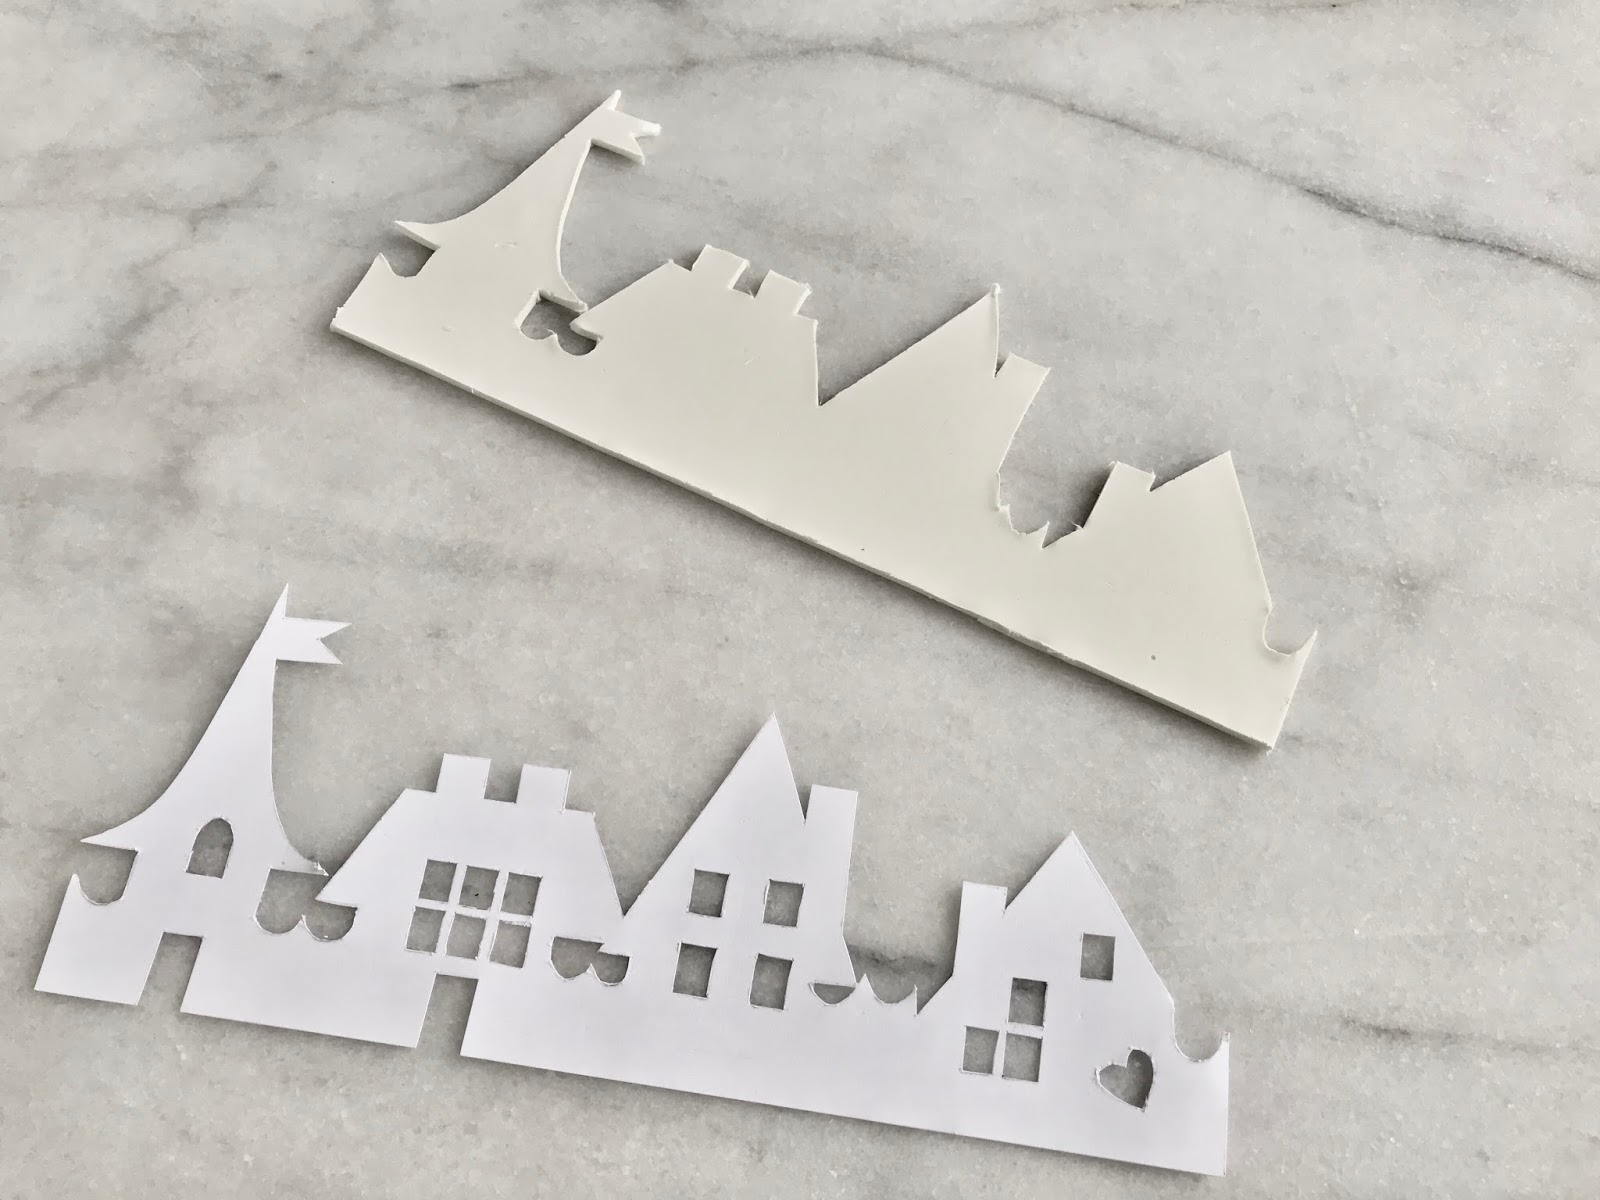
Remove paper template. Now you have a card stock template that can be used over and over.


Place paper over a cutting surface, like this small black kitchen cutting board. With your X-Acto knife, cut out all the copy paper windows, doors and heart.


Using the cut opening of the paper template as a guide, press firmly and cut out all openings of the card stock with the X-Acto knife.


With scissors, cut out the outline of the village.


Remove paper template. Now you have a card stock template that can be used over and over.


This is the stone clay I prefer to use. It is light weight, easy to roll out, smooth and quickly air dries into the shape you create. It can shrink and curl slightly during the drying process, but if you keep watch you can correct any potential curls (wet slightly and gently guide back). Remove about half of the stone clay from the package. Place
on a clean, flat surface.


Roll out, just like you would if you were making cutout
cookies.

Roll, flip and repeat until the clay is uniform, about 1/8” thick. Thinner the better.

Lay the card stock template on the clay and slightly press into the
clay just enough to hold in place.


Start at the bottom edge, use a straight to cut, if needed.

Cut out along all the outside edges.


Lift the excess off and away from your village.

Any remaining clay can be place in an air tight bag to be used later.


With an X-Acto knife, cut out windows and doors. Remove template. When you are completely finished cutting out your night light (or multiple night lights) store card stock template with a heavy object on top (like a book) while it dries so it remains flat.


Carefully wrap the village around the jar.


You may have to trim a little bit or add a little bit to join the two sides together depending on the diameter of your jar. Measure template to add or remove clay to make adjustments. Add a small rolled piece of clay to edges, dampen and press in place to lengthen or cut to remove, dampen and join by pressing into place.


Wet the cut edges slightly with a craft brush, and press them together. Smooth over seam with fingers and a little bit of water.


Wet the cut edges slightly with a craft brush, and press them together. Smooth over seam with fingers and a little bit of water.


Gently press the clay around to hug the glass.


Dip your craft brush lightly in water and smooth all cut
edges.


Dampen your fingers and lightly wet the entire surface with
water, smoothing the surface.
Place in a warm place and let dry undisturbed overnight. The
clay most likely will try to curl or shrink slightly, so I like to check on the progress,
pressing back in place if needed.

Once dry, gently give a light sand to smooth and even out surface with extra fine sandpaper.
Clean glass if needed with small brush or Q-tip. Fill with battery operated tea lights. I do not recommend using a lit tea light only because the glass can get very hot and could damage/crack the clay.


Or, a less complicated style, you can use this mini star cutter and just stamp/cutout stars in place of the windows, doors and openings. Just as pretty, just as quaint, but simpler.

Line a few to light up the mantle...

Or warm up a lonely spot...

Or tuck one on your tray and snuggle into bed...

Or line a window to welcome you inside...

A very cozy nod to the January Blues.


